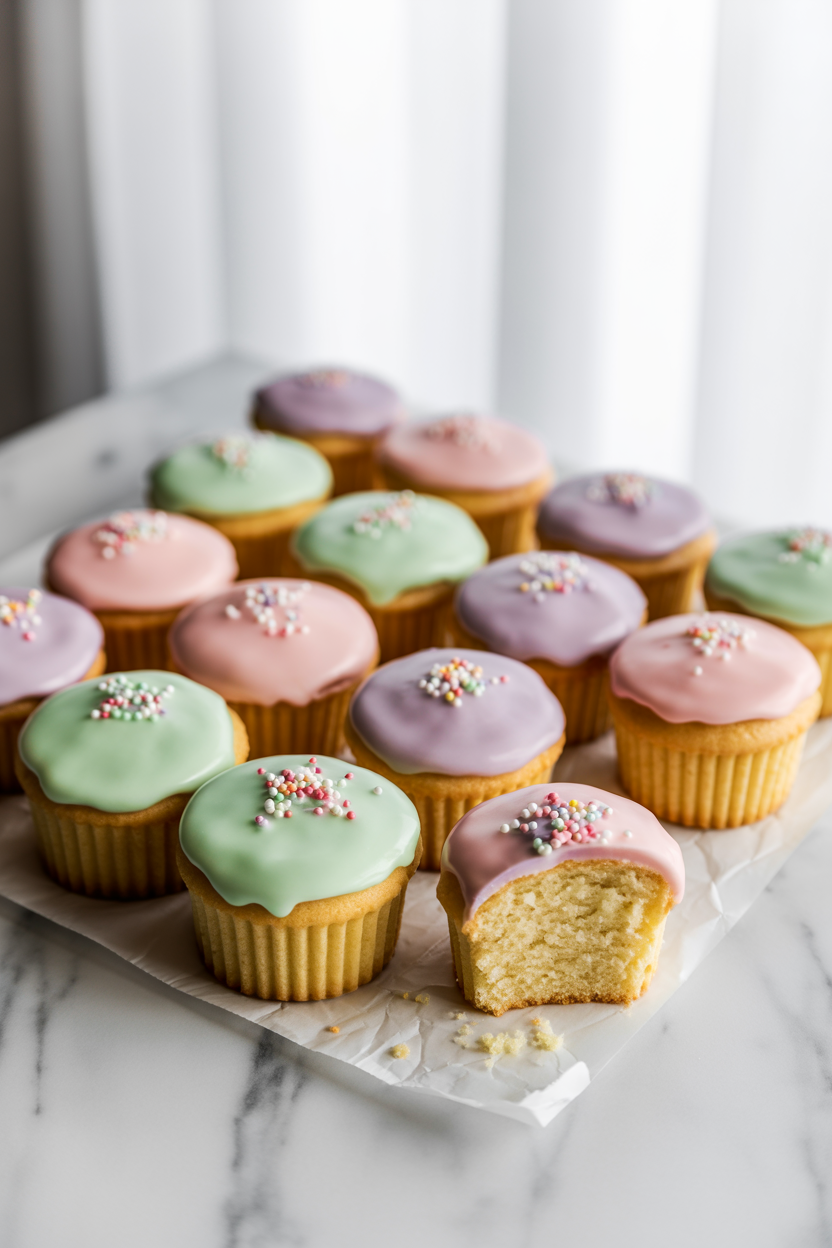
You know those moments when you want to bake something impressive but your energy levels are firmly in the “minimal effort, maximum reward” zone? That’s exactly where fairy cakes live. These tiny, fluffy little British classics have been stealing hearts at tea tables, birthday parties, and school bake sales for decades — and for very good reason. They’re fast, forgiving, ridiculously cute, and taste like someone bottled pure cheerfulness and baked it into cake form. Plus, decorating them is basically arts and crafts for adults, and nobody needs to know how much fun you had with the sprinkles. Let’s bake some magic.
Quick Look of the Recipe
| 🎯 Skill Level | ⏱️ Prep Time | 🔥 Cook Time | ⏰ Total Time |
|---|---|---|---|
| Easy | 15 mins | 15 mins | 30 mins |
| 🍽️ Servings | 📋 Course | 🌍 Cuisine | 🔥 Calories |
|---|---|---|---|
| 12 cakes | Dessert / Snack | British | ~210 kcal per cake |
Why This Recipe is Awesome

Where do we even start? Fairy cakes are the ultimate low-stakes bake — one bowl, a handful of pantry staples, and 15 minutes in the oven. The whole thing is idiot-proof, and yes, that includes you and me both. No fancy techniques, no tempering chocolate, no holding your breath over a piping bag. You mix, you bake, you ice, you eat. That’s it. That’s the whole journey.
They’re also wildly versatile. The base recipe is a blank canvas — vanilla today, lemon tomorrow, chocolate whenever life calls for it. And the decorating part? Completely yours to own. Go minimal with a clean white glaze, or go full chaos with three colours of icing and every sprinkle you own. Both outcomes are correct.
What really seals the deal though is how crowd-pleasing these are. Kids devour them. Adults pretend to be restrained and then eat four. They travel well, they plate beautifully, and they make you look like you have your life together even when you absolutely do not.
Ingredients You’ll Need
For the Cake Batter:
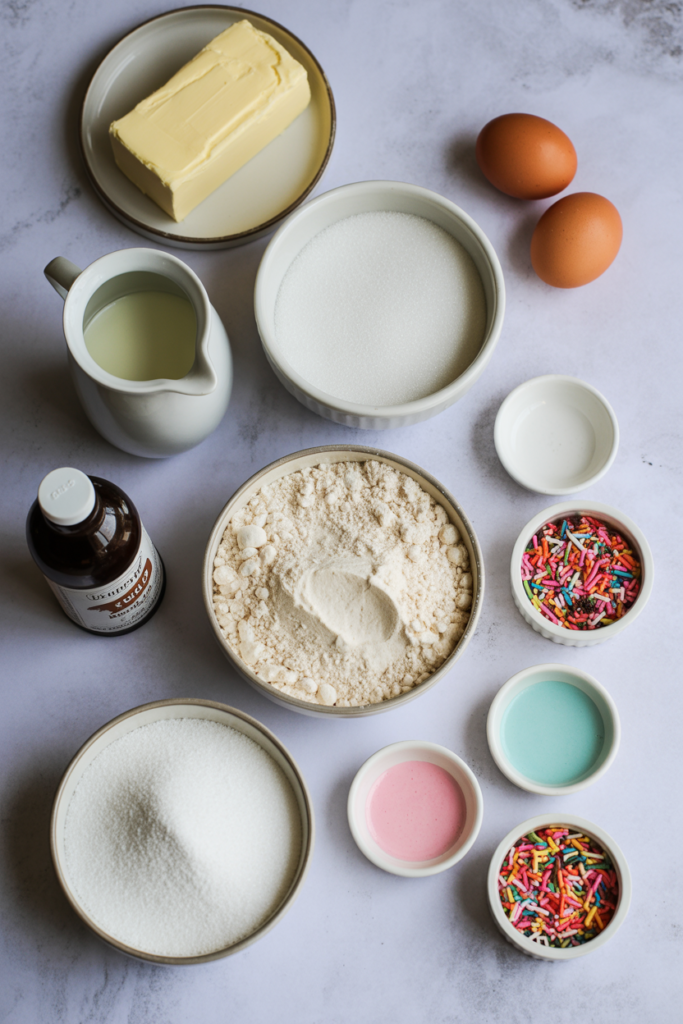
- [ ] 125g unsalted butter, softened — not fridge-cold, not melted, softened. Take it out an hour ahead and thank yourself later
- [ ] 125g caster sugar — finer than regular sugar, dissolves better, gives a lighter crumb
- [ ] 2 large eggs, room temperature — cold eggs can split the batter and nobody needs that stress
- [ ] 125g self-raising flour — leavening already built in, bless it
- [ ] 2 tbsp whole milk — just to loosen things up a touch
- [ ] 1 tsp vanilla extract — the real stuff, not the imitation. Your taste buds will know the difference
For the Icing:
- [ ] 200g icing sugar, sifted — lumpy icing is a crime, always sift
- [ ] 2–3 tbsp water or milk — add one teaspoon at a time or you’ll end up with icing soup
- [ ] Gel food colouring — optional but highly recommended for maximum visual impact
- [ ] Sprinkles, hundreds and thousands, edible glitter — whatever brings you joy, no judgment
Recommended Tools
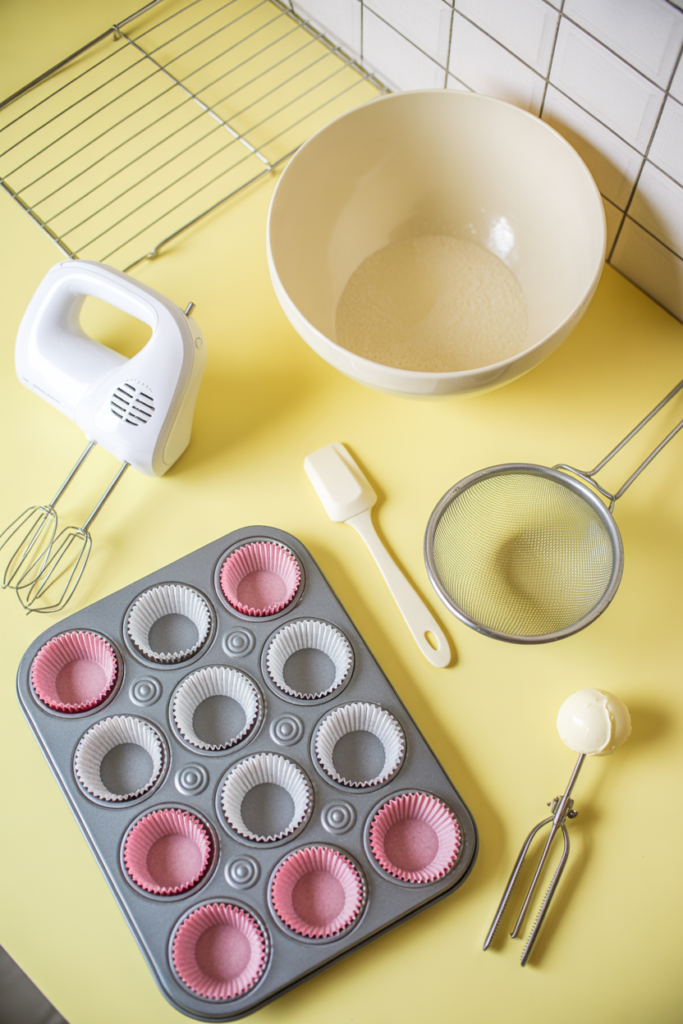
- 12-hole cupcake tin — Standard size; the foundation of this whole operation
- Paper cupcake cases — Non-negotiable unless you enjoy aggressive scrubbing after dinner
- Electric hand mixer or stand mixer — You can do it by hand but your arm will file a formal complaint
- Large mixing bowl — One good bowl handles everything here; minimal washing up, maximum happiness
- Sieve — For flour going in and icing sugar going in later; lumps ruin both
- Rubber spatula — For scraping every last bit of batter into the tin like the economical genius you are
- Wire cooling rack — Ice them warm and watch your icing slide off in defeat. The rack is not optional.
- Small spoon or ice cream scoop — For portioning batter evenly so all 12 cakes bake at the same rate
Step-by-Step Instructions
- Preheat the oven. Set it to 180°C (350°F) or 160°C fan. Line your 12-hole tin with paper cases. Don’t skip preheating — a cold oven gives you flat, dense little hockey pucks and that’s not what we’re doing today.
- Cream butter and sugar. Beat the softened butter and caster sugar together for 3–4 minutes until the mixture is pale, fluffy, and noticeably lighter in colour. This step builds the airy texture in the finished cake — give it the full time.
- Add the eggs. Crack in one egg at a time, beating well after each one. Add a small spoonful of flour with each egg to keep the mixture from splitting. If it looks a little curdled, don’t panic — it bakes out completely fine.
- Fold in the flour. Sift in the self-raising flour and fold gently with a spatula. Add the milk and vanilla and stir until just combined. Stop mixing the moment you can’t see dry flour — over-mixing develops gluten and turns your fluffy cakes tough. Stop early, always.
- Fill the cases. Divide the batter evenly between the 12 cases, filling each about two-thirds full. An ice cream scoop makes this satisfying and neat. They rise, so leave that space.
- Bake. Slide them into the centre of the preheated oven for 13–15 minutes. They’re done when they’re golden on top, spring back when pressed lightly, and a skewer comes out clean. Don’t open the oven before 12 minutes or they’ll sink and sulk.
- Cool completely. Transfer to a wire rack and walk away. Let them reach full room temperature before you even think about icing. Completely. I know it’s hard. Do it anyway.
- Ice and decorate. Mix sifted icing sugar with water or milk one teaspoon at a time until thick but pourable. Add colour if using, spoon over each cooled cake, and scatter your sprinkles immediately before the icing sets. Stand back and admire your work.
Nutrition Facts
╔══════════════════════════════════╗
║        NUTRITION FACTS           ║
║    Serving Size: 1 fairy cake    ║
║    Servings per recipe: 12       ║
╠══════════════════════════════════╣
║ Calories            210          ║
╠══════════════════════════════════╣
║ Total Fat            9g    12%   ║
║   Saturated Fat      5g    25%   ║
║   Trans Fat          0g          ║
║ Cholesterol         50mg   17%   ║
║ Sodium              45mg    2%   ║
║ Total Carbohydrate  31g    11%   ║
║   Dietary Fiber     0.4g    1%   ║
║   Total Sugars      22g          ║
║ Protein              2.5g        ║
╠══════════════════════════════════╣
║ Vitamin A            6%          ║
║ Calcium              3%          ║
║ Iron                 4%          ║
╚══════════════════════════════════╝
* % Daily Values based on 2,000 cal diet
Recipe Variations
- Lemon Fairy Cakes — Stir the zest of one lemon into the batter and swap vanilla for lemon extract. Use fresh lemon juice in the icing instead of water for a sharp, citrusy glaze that cuts through the sweetness beautifully.
- Chocolate Fairy Cakes — Replace 20g of the self-raising flour with good quality cocoa powder. Top with a simple chocolate glaze (icing sugar, cocoa, and a splash of milk) or go full buttercream if it’s been that kind of week.
- Funfetti Fairy Cakes — Fold 2 tablespoons of rainbow sprinkles directly into the finished batter before spooning into the cases. The sprinkles bleed slightly into the sponge as it bakes, creating a colourful, confetti-speckled crumb inside. Kids absolutely lose their minds for this version.
Recommended Ways to Serve
- Afternoon tea spread — Arrange them on a tiered stand alongside finger sandwiches and a proper pot of tea. Suddenly you’re hosting something that feels genuinely fancy, and the effort level was a solid 5 out of 10.
- DIY decorating station — Set out bowls of different coloured icings and toppings and let guests (or kids, or competitive adults) decorate their own. It’s interactive, fun, and means you don’t have to ice all twelve yourself. Win-win.
- Lunchbox or afternoon snack — Pack one simply iced fairy cake alongside a piece of fruit for a genuinely lovely midday treat. For kids’ lunchboxes or, let’s be honest, your own desk drawer stash.
Storing and Reheating Guidelines
- Room temperature — Store in an airtight container at room temperature for up to 3 days. Keep them out of direct sunlight or the icing gets tacky and the sponge dries out faster than you’d expect.
- Freezing un-iced cakes — The plain baked sponges freeze beautifully for up to 2 months in a sealed freezer bag. Thaw at room temperature for about an hour then ice fresh — this is the smartest prep-ahead move you can make.
- Avoiding the microwave — These genuinely don’t need reheating, but if you want that fresh-baked warmth, 10 seconds in the microwave on an un-iced cake works fine. Never microwave an iced cake — the sugar turns molten, the decoration collapses, and you’ll be sad about it.
Common Mistakes to Avoid & Fixes
| ❌ Mistake | ✅ Fix |
|---|---|
| Cold butter straight from the fridge | It won’t cream properly and your batter will be lumpy and dense. Leave butter out for at least an hour — set a reminder if you have to. |
| Overfilling the cupcake cases | Two-thirds full, not more. Overfill and they erupt over the edges, fuse together, and become a structural disaster. |
| Over-mixing after adding the flour | Fold gently and stop early. Excess mixing builds gluten and turns light sponge into chewy, tough little pucks. The spatula is your friend; the mixer is not, at this stage. |
| Icing warm cakes | The icing melts on contact, slides off, and pools on the rack. It’s genuinely upsetting to witness. Cool them fully — every single time. |
| Making the icing too thin | Add liquid one teaspoon at a time. It goes from perfect to watery in seconds and you can’t easily go back. Thick and glossy is the goal. |
| Opening the oven door too early | The cakes will sink in the middle and stay sunken. Keep that door shut until at least the 12-minute mark. Trust the process. |
Alternatives & Substitutions
- No self-raising flour? Use plain flour and add 1½ teaspoons of baking powder per 125g. Works exactly the same and IMO this is just good kitchen knowledge to have in your back pocket regardless.
- Dairy-free version — Use a good vegan block butter (block, not soft spread — this distinction really matters for creaming) and swap whole milk for oat milk. The result is genuinely impressive and tastes exactly as it should.
- No caster sugar? Blitz regular granulated sugar in a food processor for 20–30 seconds. You’ve just made caster sugar. It’s that simple and weirdly satisfying.
- Egg-free — Use a flax egg (1 tbsp ground flaxseed mixed with 3 tbsp water, rested 5 minutes) per egg. The sponge comes out slightly denser but still completely delicious, especially under a generous layer of icing.
- Buttercream instead of glace icing — Beat 100g soft butter with 200g sifted icing sugar and a splash of milk until pale and fluffy. Pipe or swirl on top for a more indulgent, cupcake-style finish. Honestly a great call if you want to take these from “cute” to “showstopper.”
FAQ (Frequently Asked Questions)
Q. What exactly is the difference between a fairy cake and a cupcake? Ans: Fairy cakes are smaller, lighter, and traditionally topped with a thin glace icing — they’re the refined British original. Cupcakes are bigger, denser, and piled high with buttercream frosting — the indulgent American remix. Both are wonderful, both deserve respect, and if someone tries to start a debate about it, just offer them cake and move on.
Q. Can I use margarine instead of butter? Ans: You can, but why hurt your soul like that? Butter delivers a richer, more rounded flavour and a better crumb structure. If you must use margarine, pick a hard baking block, not a soft spreadable tub — the water content in spreads will wreck your batter.
Q. My cakes sank in the middle — what went wrong? Ans: Three likely culprits: opening the oven door too early, underbaking (always do the skewer test), or too much liquid in the batter. Sinking middles are heartbreaking but very avoidable — just follow the bake time and resist peeking.
Q. Can I make the batter in advance? Ans: Technically yes, but it’s not ideal. The raising agents in self-raising flour activate as soon as they hit moisture, so a batter that sits around loses lift. Far better to bake them fresh and freeze the finished un-iced cakes if you’re prepping ahead.
Q. How do I get really vibrant icing colours? Ans: Ditch the liquid food colouring drops and use gel colouring instead. Gel gives you vivid, saturated colour without thinning out your icing. Start with a tiny amount — seriously, the tip of a toothpick — and build up gradually. A little goes a long way.
Q. Can I double the recipe for a bigger batch? Ans: Absolutely — this recipe doubles and triples without any drama at all. Just bake in batches rather than cramming too many tins into the oven at once, and rotate them halfway through if your oven runs unevenly.
Q. Why does my icing go dull and hard instead of shiny? Ans: Either it dried too slowly (happens in humid kitchens), the sugar-to-liquid ratio was slightly off, or it was applied too thickly. For a glossy finish, add the tiniest drop of light corn syrup or golden syrup to your icing mix — it keeps it shiny as it sets. Little professional trick right there.
Latest Articles
-
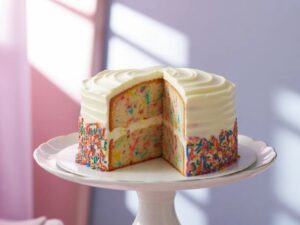
The Homemade Funfetti Cake That Makes Every Day Feel Like a Birthday
-
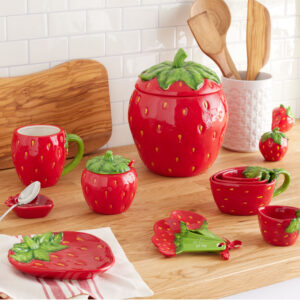
🍓 Berry & Bunting: Strawberry Kitchen Decor That Puts a Sweet Red Ripple Through Every Corner
-

The Crunchiest Air Fryer Potato Chips You’ll Ever Make at Homeere’s your
-
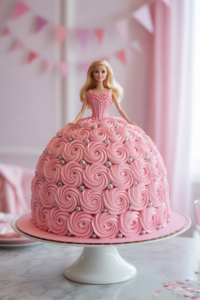
Barbie Cake: The Glamorous, Pink, Show-Stopping Birthday Cake That’s Actually Doable at Home
-

Instant Pot Chicken: The One Recipe That Makes Your Pressure Cooker Worth Every Penny
-

Final Thoughts
Thirty minutes. One bowl. Twelve little cakes that make people genuinely smile when they see them. Fairy cakes are proof that baking doesn’t need to be complicated or stressful to be completely wonderful — and that sometimes the simplest recipes are the ones you come back to again and again.
Bake them plain and classic, go wild with lemon and glitter, or make a batch of chocolate ones because it’s Wednesday and you deserve it. However you make them, they’re going to be good. Now go dust your hands in flour, get a little icing on your shirt, and make something that makes people happy — starting with yourself. You’ve absolutely earned it. 🧁