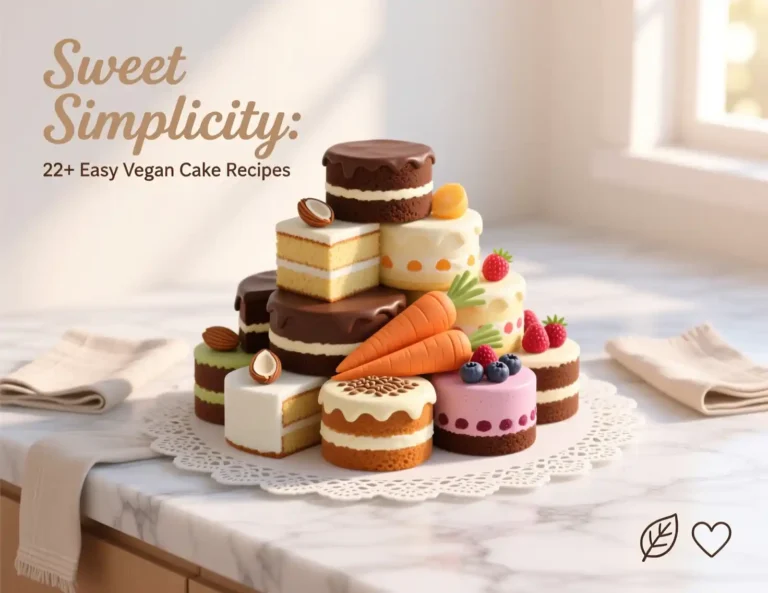
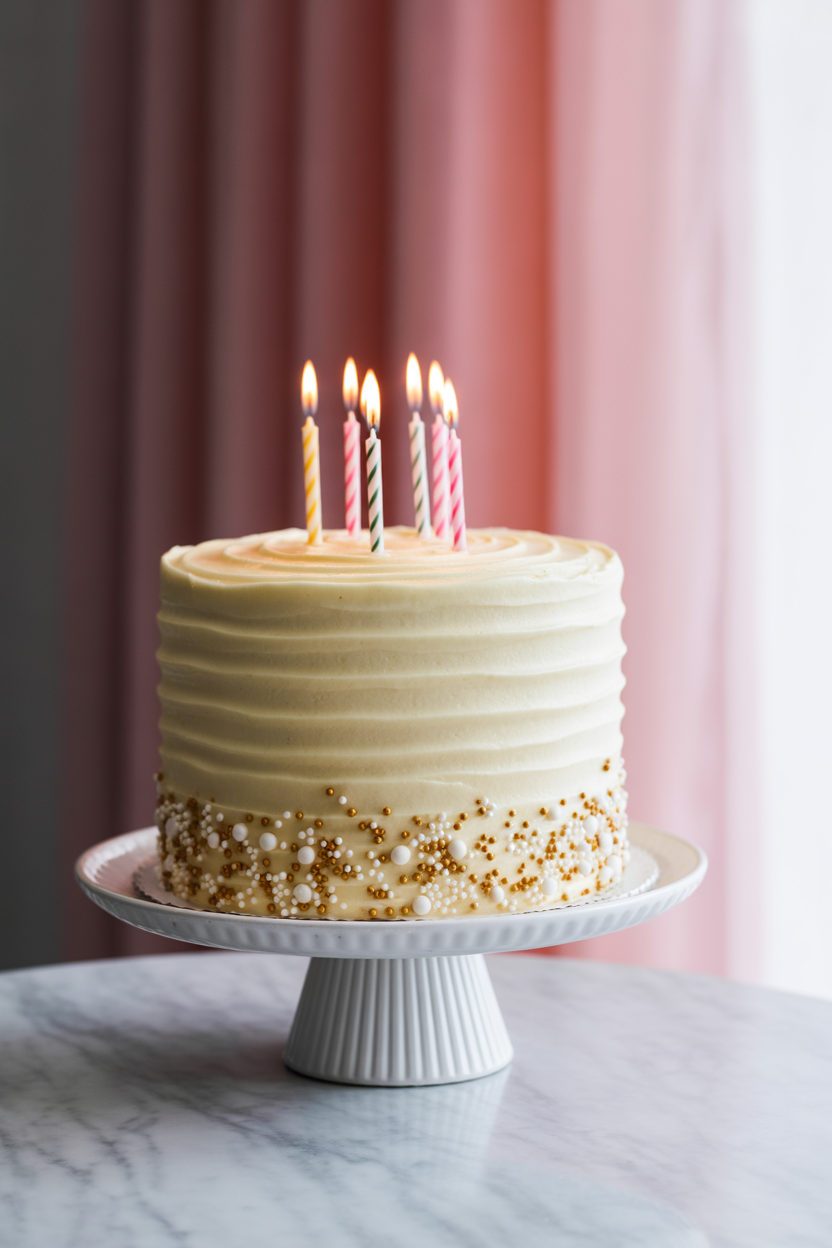
Birthdays only come once a year, which means you have exactly one shot to show up with a cake that makes people gasp instead of politely smile and reach for their phone. No pressure, right? But here’s the thing — a classic white birthday cake is actually way less intimidating than it looks. Tall, fluffy, blindingly white layers with creamy frosting? That’s not just a cake. That’s a statement. And today, you’re going to make it from scratch like the absolute legend you are. Apron on. Let’s go.
🕐 Quick Look at the Recipe
| 🎯 Skill Level | ⏱️ Prep Time | 🍳 Cook Time | ⏰ Total Time |
|---|---|---|---|
| Intermediate (you’ve got this) | 30 minutes | 30–35 minutes | ~2 hours (with cooling) |
| 🍽️ Servings | 📋 Course | 🌍 Cuisine | 🔥 Calories |
|---|---|---|---|
| 12–16 slices | Dessert | American | ~480 kcal per slice |
Why This Recipe Is Awesome
So why make a white cake from scratch when boxed mix exists? Great question. Here’s why this one wins every single time:
- It’s stunningly beautiful without trying too hard. Pure white layers look elegant, dramatic, and way more impressive than anything that came out of a cardboard box. Nobody at the party needs to know how simple it actually was.
- The texture is chef’s kiss. Using only egg whites keeps the crumb incredibly light, soft, and fluffy — like a cloud decided to become a cake. That’s the dream.
- It’s a crowd-pleaser by default. No nuts, no fruit, no controversy. Just classic vanilla-kissed white cake that literally everyone loves. Even Karen will ask for seconds.
- The frosting is stupidly good. A simple vanilla buttercream that pipes beautifully and tastes like sweet, buttery joy. FYI, you will eat it by the spoonful before the cake is even frosted. I’m not judging.
- It’s fully customizable. Use it as a base for any flavor, color, or theme. This cake is the little black dress of the dessert world.
Ingredients You’ll Need
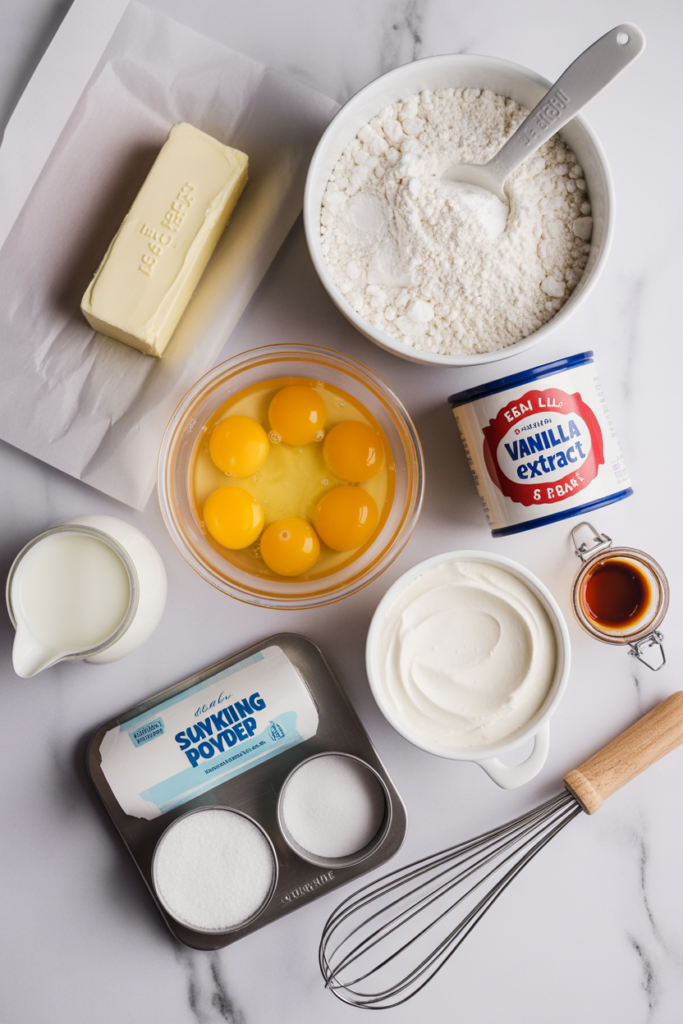
For the Cake:
- ☐ 3 cups (360g) cake flour — not all-purpose! Cake flour = softer, finer crumb. This is non-negotiable.
- ☐ 1 tbsp baking powder — your lift, your rise, your cake’s ambition
- ☐ ½ tsp salt — balances sweetness, don’t skip it
- ☐ 1 cup (225g) unsalted butter, room temperature — soft like a handshake, not melted like a bad day
- ☐ 1¾ cups (350g) granulated sugar — sweetness, obviously
- ☐ 6 large egg whites, room temperature — the secret to that gorgeous white color and fluffy texture
- ☐ 1 cup (240ml) whole milk, room temperature — full fat, full flavor, full commitment
- ☐ ½ cup (120ml) sour cream — adds moisture and a subtle tang that makes everything better
- ☐ 2 tsp pure vanilla extract — use the real stuff; imitation vanilla is a crime against baking
- ☐ 1 tsp almond extract (optional but highly recommended) — that classic “bakery taste” you can never quite place? This is it.
For the Vanilla Buttercream Frosting:
- ☐ 1½ cups (340g) unsalted butter, room temperature — again, soft, not melted
- ☐ 5–6 cups (600–720g) powdered sugar, sifted — sifted means no lumps, no drama
- ☐ 4–5 tbsp heavy cream — for that silky, spreadable consistency
- ☐ 2 tsp pure vanilla extract
- ☐ Pinch of salt — trust the process
Recommended Tools

Baking is basically delicious science — you need the right equipment:
- Stand mixer or hand mixer — creaming butter and sugar by hand is a workout nobody asked for
- Two 9-inch round cake pans — for those gorgeous layered tiers
- Parchment paper — line those pans or the cake WILL stick and you WILL cry
- Sifter or fine mesh sieve — for flour and powdered sugar, lump-free guaranteed
- Rubber spatula — essential for scraping every last bit of batter (and frosting) out
- Offset spatula — your best friend for smooth, even frosting application
- Cake turntable (optional but amazing) — makes frosting feel like a professional art form
- Cooling rack — let that cake breathe before frosting, patience is a virtue here
- Kitchen scale — baking by weight is more accurate; IMO this changes everything
Step-by-Step Instructions
Step 1: Prep everything first. Preheat your oven to 350°F (175°C). Grease your two 9-inch cake pans, line them with parchment paper circles, and grease again. Bring your butter, egg whites, milk, and sour cream to room temperature — cold ingredients ruin the batter’s texture. Set everything out before you start. Mise en place, baby.
Step 2: Mix the dry ingredients. In a large bowl, whisk together the cake flour, baking powder, and salt. Give it a good whisk for about 30 seconds to distribute evenly. Set aside.
Step 3: Cream butter and sugar. In your stand mixer fitted with the paddle attachment, beat the softened butter on medium-high speed for 2 full minutes until pale and fluffy. Add the granulated sugar and continue beating for another 3–4 minutes. Don’t rush this step — this is what creates that light, airy texture.
Step 4: Add extracts and sour cream. Mix in the vanilla extract and almond extract (if using). Add the sour cream and beat until just combined. Scrape down the sides of the bowl with a rubber spatula.
Step 5: Alternate dry ingredients and milk. With the mixer on low, add the flour mixture in three additions, alternating with the milk in two additions — starting and ending with flour. Mix only until just combined after each addition. Overmixing develops gluten and gives you a tough, dense cake. Nobody wants that.
Step 6: Fold in the egg whites. In a separate clean bowl, whisk the egg whites until they form soft peaks — or if you skipped that step, simply add room-temperature egg whites directly and fold them in gently with a spatula. Fold in two additions with slow, sweeping motions to keep the batter light.
Step 7: Bake. Divide the batter evenly between your two prepared pans. Tap each pan gently on the counter twice to release air bubbles. Bake for 30–35 minutes or until a toothpick inserted in the center comes out clean and the tops spring back when lightly touched.
Step 8: Cool completely. Let cakes cool in the pans for 15 minutes, then turn onto a wire rack to cool completely — at least 1 hour. Frosting a warm cake is a catastrophe waiting to happen. Do not rush this.
Step 9: Make the buttercream. Beat the softened butter in your stand mixer for 3–4 minutes until it’s super pale and fluffy. Add sifted powdered sugar one cup at a time, mixing on low. Add heavy cream, vanilla, and salt. Turn mixer to medium-high and beat for 2 more minutes until light and gloriously smooth.
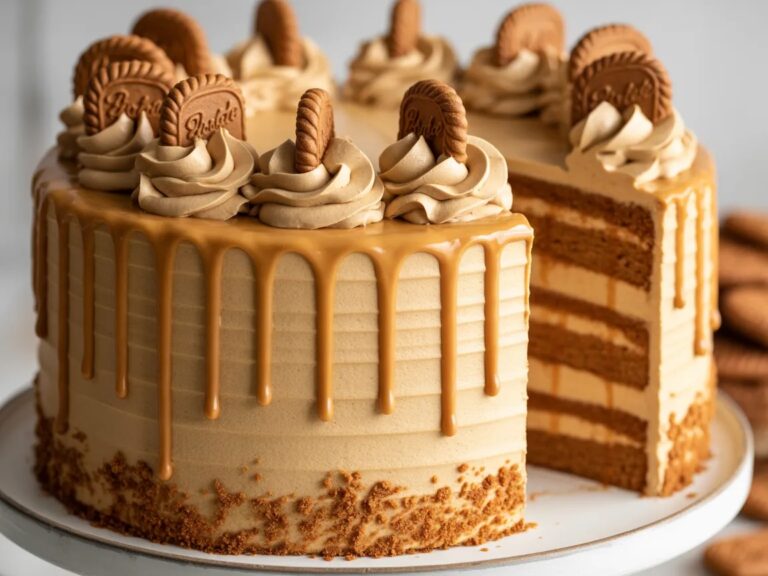
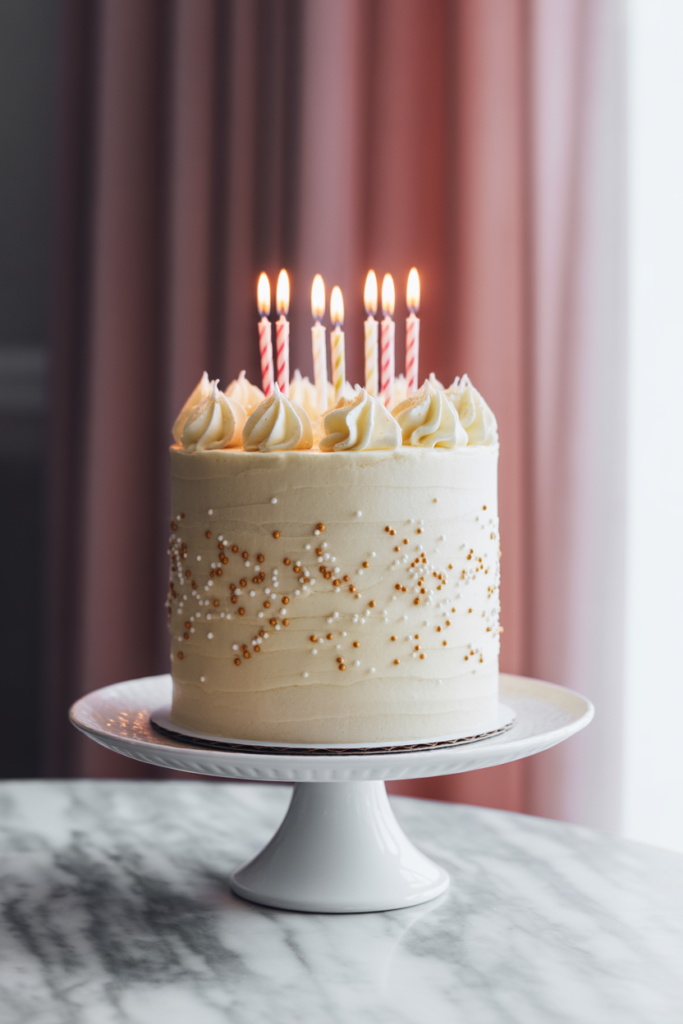
Step 10: Assemble and frost. Place one cake layer on your serving plate or cake board. Spread an even layer of buttercream on top. Place the second layer on top. Apply a thin crumb coat of frosting all over the cake, then chill for 20 minutes. Apply the final generous layer of frosting, smooth with your offset spatula, and decorate as you please. Sprinkles are always the right answer.
Nutrition Facts
Serving Size: 1 slice (1/14 of cake with frosting, approx. 130g) Servings Per Recipe: 14
| Nutrient | Amount Per Serving |
|---|---|
| Calories | 480 kcal |
| Total Fat | 24g |
| — Saturated Fat | 15g |
| — Trans Fat | 0g |
| Cholesterol | 65mg |
| Sodium | 180mg |
| Total Carbohydrates | 63g |
| — Dietary Fiber | 0.5g |
| — Total Sugars | 48g |
| Protein | 4g |
| Calcium | 60mg |
| Iron | 0.8mg |
| Potassium | 85mg |
*Percent Daily Values based on a 2,000-calorie diet. It’s a birthday cake. Live a little.
Recipe Variations
- Funfetti Birthday Cake: Fold ½ cup of rainbow sprinkles (jimmies, not nonpareils — they bleed color) into the finished batter just before pouring into pans. Instant party inside the cake. Literally.
- Lemon White Cake: Add 2 tablespoons of fresh lemon zest to the batter and swap vanilla buttercream for a bright lemon curd filling between the layers. Fresh, zingy, and somehow even more impressive.
- Strawberry & Cream Layer Cake: Fill the layers with fresh sliced strawberries and a whipped cream frosting instead of buttercream. Light, summery, and absolutely gorgeous on a dessert table.
Recommended Ways to Serve
- Classic birthday style — sliced generously on pretty plates with a scoop of vanilla bean ice cream melting alongside it, because more is more at a birthday
- As a naked cake — skip the full frosting coverage, let the layers show, and pile fresh berries and edible flowers on top for a rustic, Pinterest-worthy centerpiece
- Dessert bar style — cut into small squares, stack on a tiered tray, and let guests grab and go at a party or bridal shower; elegant and zero-stress serving
Storing and Reheating Guidelines
- Room temperature: Store the frosted cake covered with a cake dome or plastic wrap at room temperature for up to 2 days. The buttercream actually helps seal in moisture and keep those layers soft.
- Refrigerator: Store in an airtight container or well-wrapped for up to 5 days. Always bring slices to room temperature before serving — cold buttercream is stiff and the cake loses its soft, fluffy vibe straight from the fridge.
- Freezer: Wrap unfrosted cake layers individually in plastic wrap, then foil, and freeze for up to 3 months. Thaw overnight in the fridge. Frost after thawing for the freshest result possible.
Common Mistakes to Avoid & Fixes
| ❌ Mistake | ✅ Fix |
|---|---|
| Using cold butter and eggs straight from the fridge | Room temperature ingredients emulsify properly and create a smooth batter. Plan ahead — take everything out 1–2 hours before baking. Cold butter = lumpy batter = sad cake. |
| Using all-purpose flour instead of cake flour | Cake flour has less protein, which means a softer, more delicate crumb. Swap it and you’ll get a denser, chewier result. Wrong vibe entirely. |
| Overmixing after adding flour | Gluten development is the enemy here. Mix only until the flour disappears. The moment it’s combined, stop. Step away. |
| Frosting a warm cake | The buttercream will melt, slide, and make everything look like a disaster. Cool completely — every single minute matters. |
| Skipping the crumb coat | That first thin layer of frosting traps crumbs so your final coat stays clean and beautiful. Skip it and you’ll have a crumb-speckled mess. Rookie mistake. |
| Not leveling the cake layers | Domed tops make lopsided cakes. Use a serrated knife to slice the dome off each layer before assembling. Flat layers = professional-looking cake. |
Alternatives & Substitutions
- Cake flour substitute — mix ¾ cup all-purpose flour + 2 tbsp cornstarch per cup of cake flour needed. It’s not identical, but it genuinely works in a pinch.
- Sour cream swap — full-fat plain Greek yogurt is a solid 1:1 substitute. Same moisture, same subtle tang. You honestly won’t notice the difference.
- Dairy-free version — use vegan butter, full-fat coconut milk in place of whole milk, and coconut cream instead of heavy cream in the frosting. It works surprisingly well, and nobody will know.
- Almond extract alternative — if you have a nut allergy concern (almond extract is technically tree nut-derived), just double up on vanilla. The cake is still incredible, just more classically vanilla-forward.
- Powdered sugar reduction — if the frosting feels too sweet, add an extra tablespoon of heavy cream and a slightly bigger pinch of salt. It takes the edge off beautifully.
- Egg white substitute — aquafaba (the liquid from a can of chickpeas) works as an egg white replacement at 3 tablespoons per egg white. Wild but true.
FAQ (Frequently Asked Questions)
Q. Can I make this cake in advance? Ans: Absolutely, and honestly you should. Bake the layers a day ahead, wrap them tightly, and store at room temperature. Make the frosting fresh on assembly day for the best texture. Spreading the process over two days makes it feel way less overwhelming.
Q. Can I use whole eggs instead of just egg whites? Ans: You can, but then it’s no longer a white cake — it’s a yellow cake. The yolks add color and richness that change the whole character of the cake. If that’s what you want, great! But if you’re going for that pristine white crumb, stick to egg whites only.
Q. Why is my cake dense instead of fluffy? Ans: A few culprits: overmixed batter, cold ingredients, too much flour (always measure by spooning into the cup, not scooping), or undercreamed butter and sugar. Any one of these can deflate your dreams — and your cake.
Q. Can I turn this into cupcakes? Ans: Yes, and they’re adorable. Fill cupcake liners ⅔ full and bake at 350°F for 18–22 minutes. This recipe makes about 28–30 cupcakes. Perfect for when you want individual servings and zero slicing drama.
Q. My frosting is too stiff. Help? Ans: Add heavy cream one tablespoon at a time and beat on medium speed until it loosens up. If it’s too soft and won’t hold shape, add more sifted powdered sugar. Frosting is very forgiving — just adjust slowly.
Q. Can I add food coloring to the cake or frosting? Ans: One hundred percent yes. Gel food coloring is the move — it gives vibrant color without adding excess liquid. Stir it into the batter gently at the end, or mix it into the frosting for pastel or bold tones. Hello, rainbow layers.
Q. Do I really need a stand mixer? Ans: A hand mixer works perfectly fine! A whisk and elbow grease technically works too, but creaming butter and sugar by hand for 5 minutes is the kind of character-building exercise nobody needs. Borrow a mixer if you have to. Your arms will thank you.
Latest Articles
-
Chocolate Cake Decoration: Make It Look Like You Actually Tried
-
-
🥬 Kitchen Vegetable Storage: Keeping Your Harvest Fresh as a Dew-Kissed Meadow
-

Air Fryer Baked Potatoes: Crispy Outside, Fluffy Inside, Zero Patience Required
-

Hashbrown Breakfast Casserole: The Breakfast That Does All the Heavy Lifting
-
🍳 Kitchen Decor Ideas: Transforming Your Cooking Space into a Warm, Functional Meadow
Final Thoughts
Look, you just made a classic white birthday cake from scratch. From. Scratch. That’s not nothing — that’s actually kind of a big deal, and you should feel genuinely proud. Whether it’s perfectly smooth or slightly lopsided with too many sprinkles, it was made with real ingredients, real effort, and that counts for everything.
The people eating it won’t care if the layers are perfectly even. They’ll care that someone loved them enough to bake something beautiful from scratch. And that? That’s the whole point of birthday cake.
Now go light some candles, sing a little off-key, and slice into that gorgeous thing. You’ve absolutely earned it. 🎂