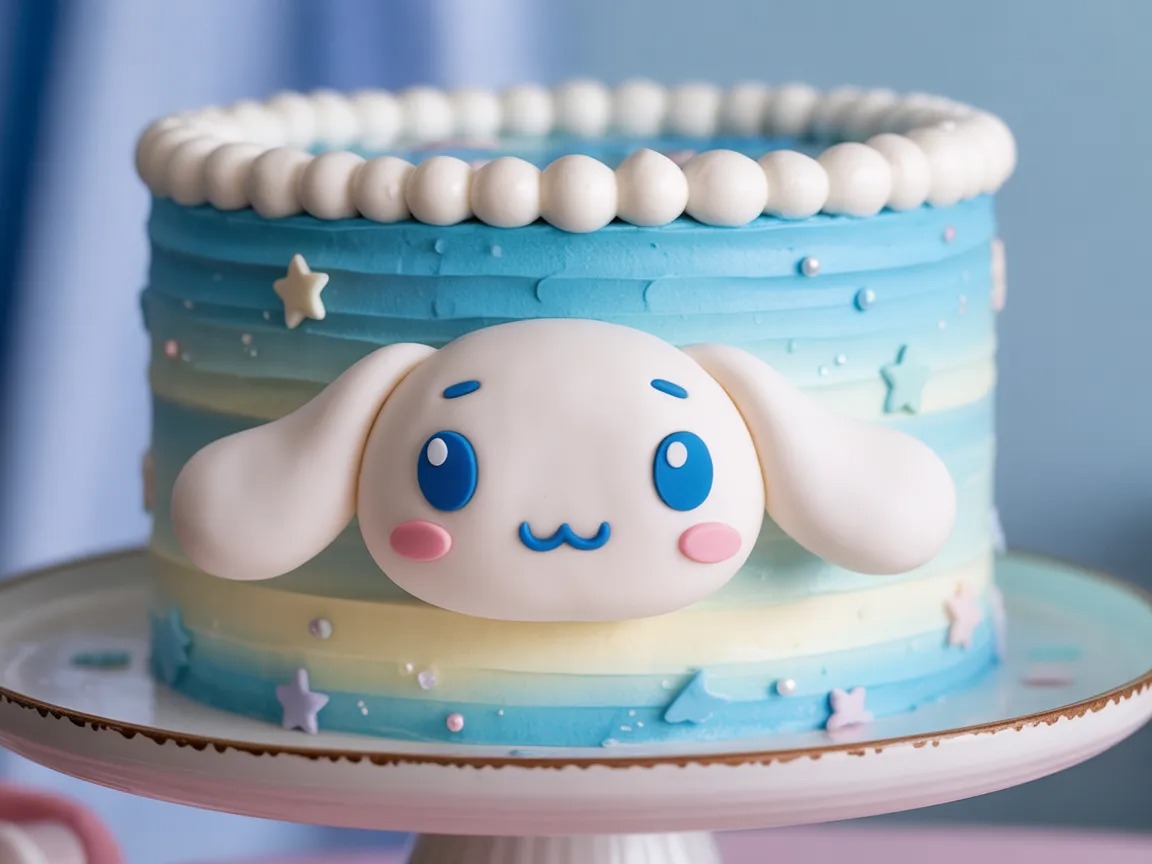
You know that feeling when something is almost too adorable to eat? That’s exactly the energy of a Cinnamoroll cake — fluffy white layers, soft pastel blue and white frosting, and that iconic round-faced, long-eared Sanrio puppy decorating the top in all his cloud-like glory. Is it a cake? Is it a work of art? The answer is both, and you’re going to make it. Whether you’re baking this for a birthday, a Sanrio-obsessed friend, or purely for the chaotic joy of it — this recipe walks you through every step with zero judgment and maximum encouragement. Let’s bake something ridiculously cute.
Quick Look at the Recipe
| 🎓 Skill Level | ⏱️ Prep Time | 🍳 Cook Time | ⏰ Total Time |
|---|---|---|---|
| Intermediate | 45 minutes | 35 minutes | 2 hours 30 minutes (including cooling & decorating) |
| 🍽️ Servings | 📋 Course | 🌍 Cuisine | 🔥 Calories |
|---|---|---|---|
| 12 slices | Dessert | Japanese-inspired | ~520 kcal per slice |
Why This Recipe is Awesome
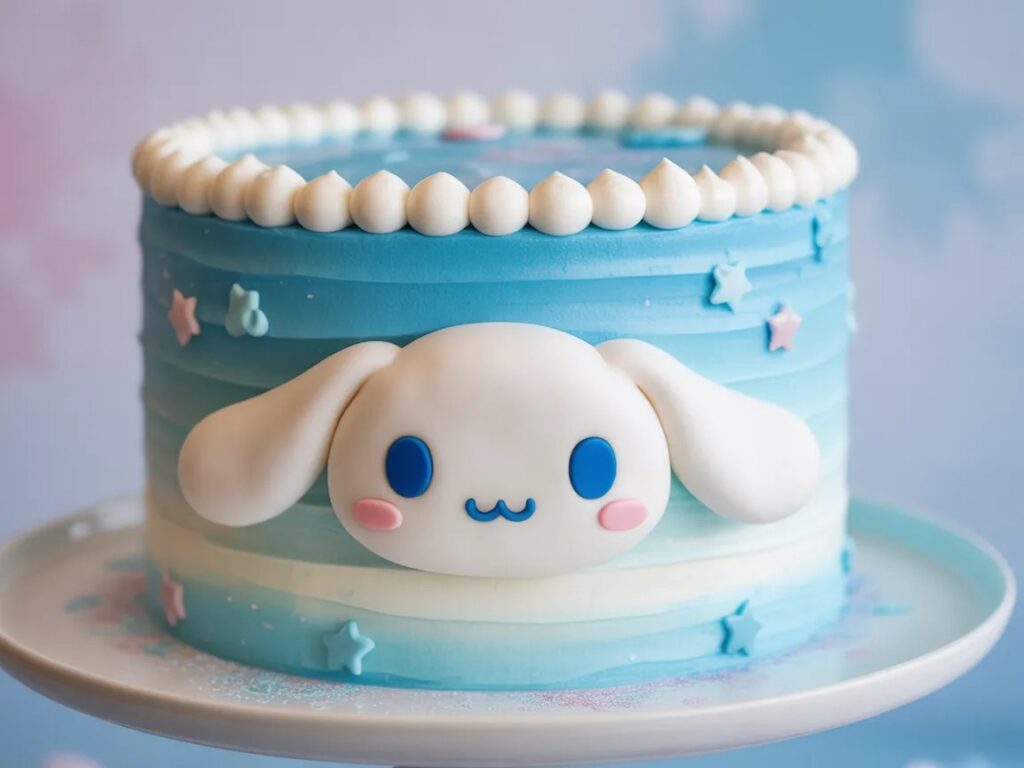
Let’s be honest — the main appeal of a Cinnamoroll cake is that it looks like it came straight out of a Sanrio pop-up cafe in Harajuku, and yet you made it in your own kitchen. The cake itself is a soft, fluffy vanilla chiffon-style sponge with a delicate hint of cinnamon — because Cinnamoroll is literally named after cinnamon, so that flavor choice is non-negotiable and also delicious. The frosting is cloud-white whipped buttercream with gentle pastel blue accents, and the decoration brings the whole character to life on top.
The cake is genuinely impressive without requiring professional cake artist skills. The Cinnamoroll face on top uses simple fondant or piped frosting shapes — a round white head, big blue eyes, pink cheeks, and those signature floppy ears. If your Cinnamoroll ends up looking slightly abstract — that’s called a charming interpretation, and we fully support it. This cake wins the room before anyone takes a single bite.
Ingredients You’ll Need
For the Vanilla Cinnamon Sponge (Two 8-inch Layers):
- [ ] 2 ¼ cups (280g) cake flour — lower protein than all-purpose, gives you that soft, tender crumb; worth seeking out
- [ ] 2 tsp baking powder
- [ ] ½ tsp baking soda
- [ ] 1 tsp ground cinnamon — subtle but essential; this is Cinnamoroll’s cake, after all
- [ ] ¼ tsp fine salt
- [ ] 1 cup (225g) unsalted butter, softened — room temperature is not optional, it’s law
- [ ] 1 ¾ cups (350g) granulated white sugar
- [ ] 4 large eggs, room temperature
- [ ] 2 tsp pure vanilla extract
- [ ] 1 cup (240ml) whole milk, room temperature
- [ ] 2 tbsp sour cream — adds moisture and a subtle tang that keeps the crumb soft for days
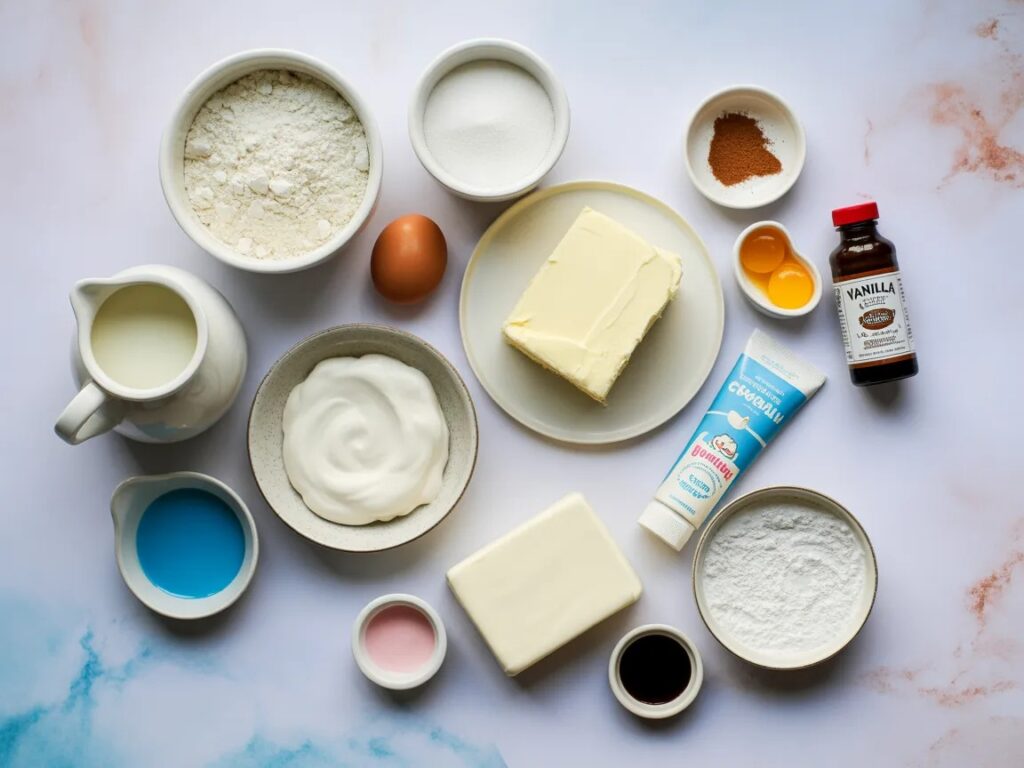
For the Cloud White Buttercream:
- [ ] 1 ½ cups (340g) unsalted butter, softened
- [ ] 4 cups (500g) powdered sugar, sifted
- [ ] 3–4 tbsp heavy cream
- [ ] 2 tsp vanilla extract
- [ ] Pinch of salt
- [ ] Sky blue gel food coloring — gel only; liquid food coloring thins the frosting and the color payoff is weak
For the Cinnamoroll Decoration:
- [ ] 250g white fondant — for the face, ears, and body details
- [ ] Black, blue, and pink gel food coloring — for the eyes, nose, and cheeks
- [ ] Edible pearl dust or shimmer — optional but gives the decoration a dreamy, cloud-like glow
- [ ] Pastel blue and white sprinkles or star-shaped sugar decorations — for the sides and top border
Recommended Tools
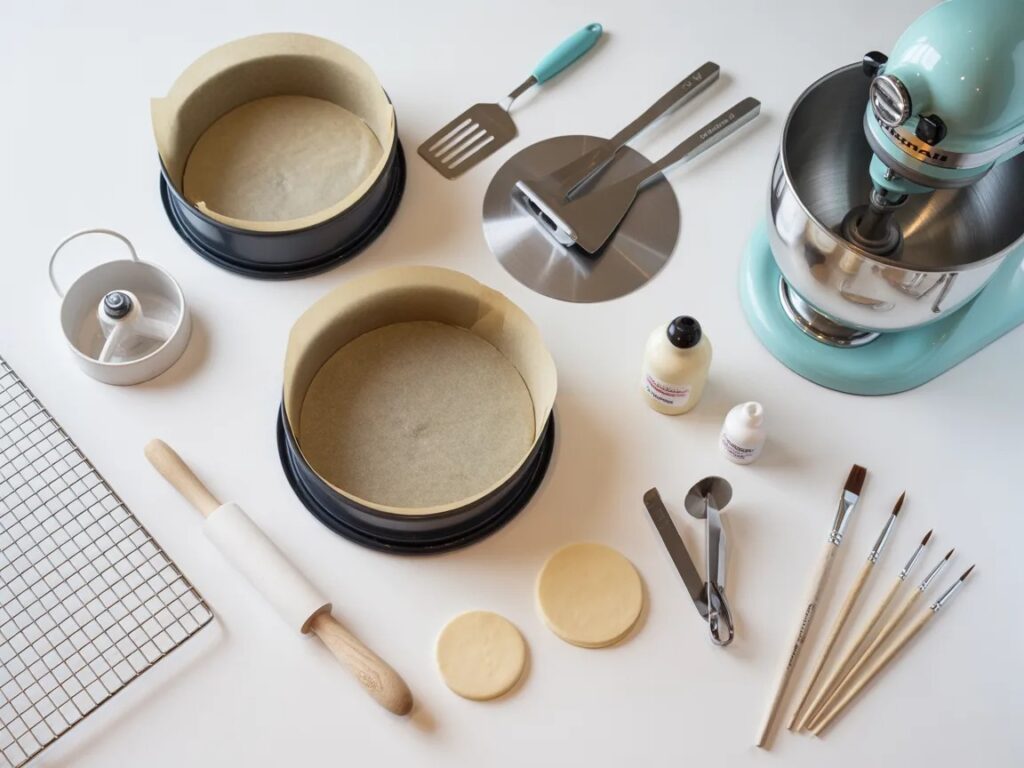
- Two 8-inch round cake pans — lined with parchment; don’t attempt this without lining them
- Stand mixer or electric hand mixer — for the buttercream especially; your arm is not a substitute
- Offset spatula — essential for smooth frosting application without losing your mind
- Bench scraper — for getting clean, smooth sides on the cake
- Piping bags and round tips — sizes #1A (large round) and #3 (small round) for borders and details
- Fondant rolling pin and smooth work surface — for rolling out the Cinnamoroll decorations
- Small circle cookie cutter (3-inch) — for cutting the round Cinnamoroll face from fondant
- Food-safe paintbrushes — for adding color details to fondant with gel coloring
- Cooling rack — completely non-negotiable; frost a warm cake and everything collapses
- Cake turntable — transforms frosting from frustrating to smooth and satisfying
Step-by-Step Instructions
1. Preheat and Prep Your Pans Preheat the oven to 350°F (175°C). Grease two 8-inch round pans generously, line the bottoms with parchment paper circles, and grease the paper too. This double-grease method ensures your sponge layers release cleanly every time — no tragic stuck cake situations allowed on a Cinnamoroll bake.
2. Mix the Dry Ingredients Whisk together cake flour, baking powder, baking soda, cinnamon, and salt in a medium bowl. Set aside. Combining your dry ingredients first ensures even distribution of the leavening agents — which means an even, consistent rise across both layers instead of a lopsided mountain.
3. Cream Butter and Sugar Beat the softened butter and sugar together on medium-high for 4–5 full minutes until the mixture is pale, fluffy, and significantly increased in volume. This is the structural foundation of your cake — under-creaming leads to a dense, heavy result. Add the sour cream and beat for another 30 seconds.
4. Add Eggs and Vanilla Add the eggs one at a time, beating well after each addition. Scrape down the sides of the bowl between each egg. Add vanilla extract and mix until combined. The batter should look smooth, glossy, and slightly billowy at this stage — if it looks curdled, your eggs were too cold.
5. Alternate Dry Ingredients and Milk With the mixer on low, add the flour mixture in three additions, alternating with the milk in two additions. Start and end with flour. Mix only until just combined — once you stop seeing dry streaks, stop mixing. Overworked batter develops gluten and gives you a chewy, tough cake instead of a tender cloud.
6. Bake the Layers Divide the batter evenly between both prepared pans and smooth the tops. Bake for 30–35 minutes until a toothpick inserted in the center comes out clean and the tops spring back when lightly touched. Cool in the pans for 15 minutes, then turn out onto a wire rack to cool completely before any frosting happens.
7. Make the Buttercream Beat softened butter on high for 3–4 minutes until pale and fluffy. Add sifted powdered sugar gradually, mixing on low first — protect your kitchen from a powdered sugar explosion. Add heavy cream, vanilla, and salt. Beat on high for 2–3 minutes until the buttercream is light, smooth, and spreadable. Divide into two portions — keep one white for the crumb coat and interior, tint the other with sky blue gel coloring for the outer coat.
8. Make the Cinnamoroll Fondant Decorations Knead the white fondant until smooth and pliable. For the face: roll to about ¼ inch thickness and cut a 3-inch circle. For the ears: shape two oval teardrop pieces. For the body: form a round dome shape. Let the pieces firm up slightly at room temperature for 30 minutes. Paint the facial features using a fine food-safe brush dipped in gel coloring — two large oval blue eyes, a small blue oval nose centered below, and two pink blush circles on the cheeks.
9. Assemble and Frost the Cake Place the first layer on your cake board or serving plate. Spread a generous layer of white buttercream on top. Add the second layer. Apply a thin white crumb coat all over the cake and refrigerate for 20 minutes. Apply the final sky blue buttercream coat smoothly using your offset spatula and bench scraper. Pipe a white cloud border around the top edge using the large round tip.
10. Decorate and Assemble Cinnamoroll Position the fondant face in the center of the cake top. Place the ears at the top of the face, slightly angled outward. Add the body shape if desired in front of the face. Scatter pastel blue stars and white sprinkles around the border. Add a dusting of edible shimmer over the fondant face for that dreamy, cloud-like glow. Step back and marvel at what you just created.
Nutrition Facts
| Serving Size | 1 slice (1/12 of cake) |
| Calories | 520 kcal |
| Total Fat | 28g |
| — Saturated Fat | 17g |
| — Trans Fat | 0.5g |
| Cholesterol | 120mg |
| Sodium | 195mg |
| Total Carbohydrates | 64g |
| — Dietary Fiber | 0.5g |
| — Total Sugars | 50g |
| Protein | 5g |
| Calcium | 55mg |
| Iron | 0.8mg |
Based on 12 servings with buttercream frosting. Fondant decoration values not included. Values are estimates.
Recipe Variations
- Strawberry Cinnamoroll Cake: Add ¼ cup of freeze-dried strawberry powder to the buttercream and tint it a soft blush pink instead of blue. Fill the layers with fresh strawberry jam and whipped cream. The pastel pink palette still fits the soft Cinnamoroll aesthetic beautifully and tastes like spring in cake form.
- Cinnamoroll Cupcakes: Use this exact batter in lined cupcake tins, filling each ¾ full, and bake at 350°F for 18–20 minutes. Frost each with a cloud swirl of blue buttercream and place a small hand-shaped fondant Cinnamoroll face on top. They’re perfect for parties, easier to serve than a whole cake, and just as impossibly cute.
- Japanese Milk Bread Style Layered Cake: Replace the standard sponge with a Japanese cotton-soft chiffon sponge (using cake flour, oil, and folded egg whites) for an ultra-light, barely-sweet cloud texture that leans into the Japanese café aesthetic even more authentically. Fill with lightly sweetened whipped cream and fresh fruit. FYI this version is extraordinary.
Recommended Ways to Serve
- As a Birthday Centrepiece: Place the fully decorated cake on a white cake stand surrounded by Cinnamoroll plushies, pastel balloons, and blue and white streamers. Photograph extensively before cutting — this cake deserves its moment. It will be the most photographed thing at any birthday party, guaranteed.
- At a Sanrio-Themed Afternoon Tea: Serve slices alongside Cinnamoroll cupcakes, blue lemonade, and white chocolate-dipped strawberries. Use pastel blue plates and cloud-shaped cookies to complete the theme. The aesthetic cohesion will make the whole table look like it was styled by a professional.
- Casually with Coffee or Milk Tea: Sometimes you just want a slice of something cute and delicious without an occasion. Cut a generous slice, pour a glass of cold milk or a warm hojicha latte, and enjoy the fact that you made something this beautiful. No party required — you are the occasion.
Storing and Reheating Guidelines
- Room Temperature (short term): Store the frosted cake under a cake dome at room temperature for up to 2 days in a cool environment. The fondant decorations can soften slightly in humidity — if you’re in a warm climate, refrigerate instead and bring to room temperature before serving.
- Refrigerator: Keep the cake in an airtight container or covered with a cake dome in the fridge for up to 5 days. Note that fondant can absorb moisture from the fridge and become slightly tacky — this is normal and doesn’t affect flavor. Always bring the cake to room temperature for 30–45 minutes before serving so the buttercream softens back to its best texture.
- Freezer (unfrosted layers only): Wrap individual sponge layers tightly in plastic wrap and then foil and freeze for up to 3 months. Thaw overnight in the refrigerator, bring to room temperature, then frost and decorate fresh. Frosted decorated cakes with fondant don’t freeze well — the fondant weeps and the decoration degrades.
Common Mistakes to Avoid & Fixes
| ❌ Mistake | ✅ Fix |
|---|---|
| Using cold butter and eggs | Cold ingredients don’t incorporate properly and your batter will look broken and grainy. Pull everything out at least an hour before baking. Room temperature is not a suggestion. |
| Frosting a warm cake | The buttercream melts, slides, and takes your Cinnamoroll decoration with it. Cool the layers completely — all the way through — before any frosting goes near them. |
| Using liquid food coloring instead of gel | Liquid coloring thins the frosting significantly and produces weak, washed-out color. Gel food coloring gives vibrant color with just a tiny amount. It’s not interchangeable. |
| Making fondant decorations on the day | Fondant needs time to firm up before it can be handled and placed on the cake cleanly. Make the Cinnamoroll face and ears at least a day ahead so they hold their shape perfectly. |
| Skipping the crumb coat | Go straight to the final coat and you’ll drag cake crumbs through your beautiful blue buttercream. The crumb coat and 20-minute chill is what makes a clean professional finish possible. |
| Rushing the creaming step | Under-creaming butter and sugar gives you a dense, flat sponge instead of a fluffy one. Four to five full minutes on medium-high — set a timer, don’t guess. |
Alternatives & Substitutions
- No cake flour? Make your own — for every cup of all-purpose flour, remove 2 tablespoons and replace with 2 tablespoons of cornstarch. Sift together three times. It’s not identical to cake flour but produces a noticeably more tender crumb than plain all-purpose alone.
- No fondant for decorations? Use stiff white buttercream piped into shapes instead. Pipe a large round disc for the face, elongated teardrops for the ears, and add the facial features with a tiny piping tip and colored buttercream. It’s softer in appearance but achieves the same adorable effect. IMO the piped version has a charm of its own.
- No sour cream? Full-fat Greek yogurt works perfectly as a 1:1 substitute — same moisture, same subtle tang, same effect on crumb texture. Plain whole milk yogurt also works well.
- Dairy-free version: Substitute butter with a good vegan butter (Miyoko’s or Earth Balance), whole milk with oat milk, sour cream with dairy-free coconut yogurt, and heavy cream with full-fat canned coconut cream. The cake is still soft, delicious, and just as cute.
- Sky blue gel color alternatives: If you can only find navy or royal blue, use the absolute tiniest amount — less than a toothpick tip — and mix thoroughly before adding more. Sky blue is a very pale tint; you want a whisper of color, not Smurfette. Less is dramatically more here.
FAQ (Frequently Asked Questions)
Q. Do I need artistic skills to make the Cinnamoroll face on top? Ans: Genuinely, no. The Cinnamoroll character design is beautifully simple — a round white circle, two big ovals for eyes, a tiny nose, pink circles for cheeks, and floppy ears. If you can cut a circle and paint on two ovals with a brush, you can make this face. It doesn’t need to be perfect to be completely charming. Embrace any imperfections — they give it personality.
Q. Can I make this cake a day ahead of time? Ans: Absolutely — and honestly, this is a great idea for stress-free serving. Bake the layers up to 2 days ahead and store wrapped at room temperature. Make the fondant decorations 1–2 days ahead. Frost and assemble the day before serving, then refrigerate overnight. Bring to room temperature before presenting. Day-ahead assembly is actually better because the layers settle and the frosting firms up beautifully.
Q. What’s the best way to get smooth blue frosting without streaks? Ans: Start with a completely smooth crumb coat that’s been chilled for at least 20 minutes. Apply the blue buttercream in one generous layer, then use a bench scraper held at a 45-degree angle against the side while slowly rotating the cake turntable. Smooth in one direction, one pass. Wipe the scraper clean between passes. Patience and a good bench scraper get you 90% of the way there.
Q. Can I use store-bought fondant or should I make my own? Ans: Store-bought fondant works perfectly well for decorations of this size — you’re not covering the whole cake in fondant, just making a few character pieces. Wilton and Satin Ice are reliable brands. If you want to make your own marshmallow fondant, it’s softer, sweeter, and easier to work with for beginners — a quick Google of the method will serve you well.
Q. My buttercream is too blue — can I fix it? Ans: Yes — add more white buttercream and mix thoroughly to dilute the color. This is why you always add gel coloring one toothpick-tip at a time and mix fully before adding more. You can always go darker; you can’t go lighter without adding more white base. Add slowly, mix fully, evaluate, repeat.
Q. Can I add cinnamon to the frosting as well as the cake? Ans: You can — a pinch of cinnamon in the white buttercream filling between layers adds a lovely warmth that complements the sponge beautifully. Avoid it in the outer blue coat though, as the specks affect the clean appearance of the frosting. Keep the visual clean, hide the flavor surprise inside. It’s a delightful little detail.
Q. Is this cake suitable for young children’s birthdays? Ans: It’s a fantastic children’s birthday cake — the Sanrio character theme is universally beloved by kids, the flavor is a gentle vanilla cinnamon that’s crowd-pleasing, and the pastel colors are visually delightful. Just check for any nut allergies if using almond extract as a substitute, and ensure all food colorings are child-safe. The reaction when kids see this cake is worth every single minute of effort.
Latest Articles
-
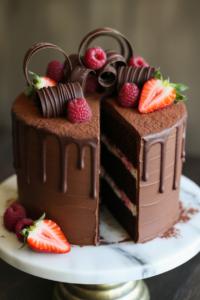
Chocolate Cake Decoration: Make It Look Like You Actually Tried
-
-
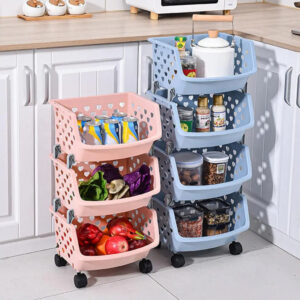
🥬 Kitchen Vegetable Storage: Keeping Your Harvest Fresh as a Dew-Kissed Meadow
-
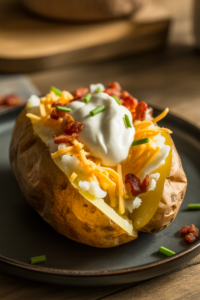
Air Fryer Baked Potatoes: Crispy Outside, Fluffy Inside, Zero Patience Required
-

Hashbrown Breakfast Casserole: The Breakfast That Does All the Heavy Lifting
-
🍳 Kitchen Decor Ideas: Transforming Your Cooking Space into a Warm, Functional Meadow
Final Thoughts
Here’s the thing about making a Cinnamoroll cake — it’s not just baking, it’s creating a moment. The look on someone’s face when they see that round, sleepy-eyed little character on top of a beautifully frosted cake is genuinely priceless, and you made that happen. The sponge is soft and warmly spiced, the buttercream is cloud-like and dreamy, and the decoration is as charming as the character himself. Is it the most technically demanding cake? No. Is it the most joyful one you’ll ever make? Almost certainly. Now go impress someone — or yourself — with your new culinary skills. You’ve absolutely earned it. And yes, it counts as self-care if you eat the first slice alone while admiring your work.