
Let’s be honest — there’s something deeply satisfying about pulling a homemade cake out of the oven that you made entirely from scratch. No mysterious powder packets, no artificial everything, just real ingredients that you combined with your own two hands into something genuinely beautiful and delicious. Does it take slightly more effort than a box mix? Yes. Is the difference in flavor, texture, and personal satisfaction absolutely worth it? Also yes — by a mile. This classic homemade vanilla butter cake with silky chocolate buttercream is the kind of recipe that becomes your go-to for birthdays, celebrations, random Saturdays, and every occasion in between. And once you’ve made it once, you’ll wonder why you ever settled for anything less.
Quick Look at the Recipe
| 🧠 Skill Level | ⏱️ Prep Time | 🍳 Cook Time | ⏰ Total Time |
|---|---|---|---|
| Intermediate | 25 minutes | 30–35 minutes | ~1 hour 30 minutes |
| 🍽️ Servings | 📋 Course | 🌍 Cuisine | 🔥 Calories |
|---|---|---|---|
| 12–14 slices | Dessert / Celebration | American | ~450 per slice |
Why This Recipe is Awesome
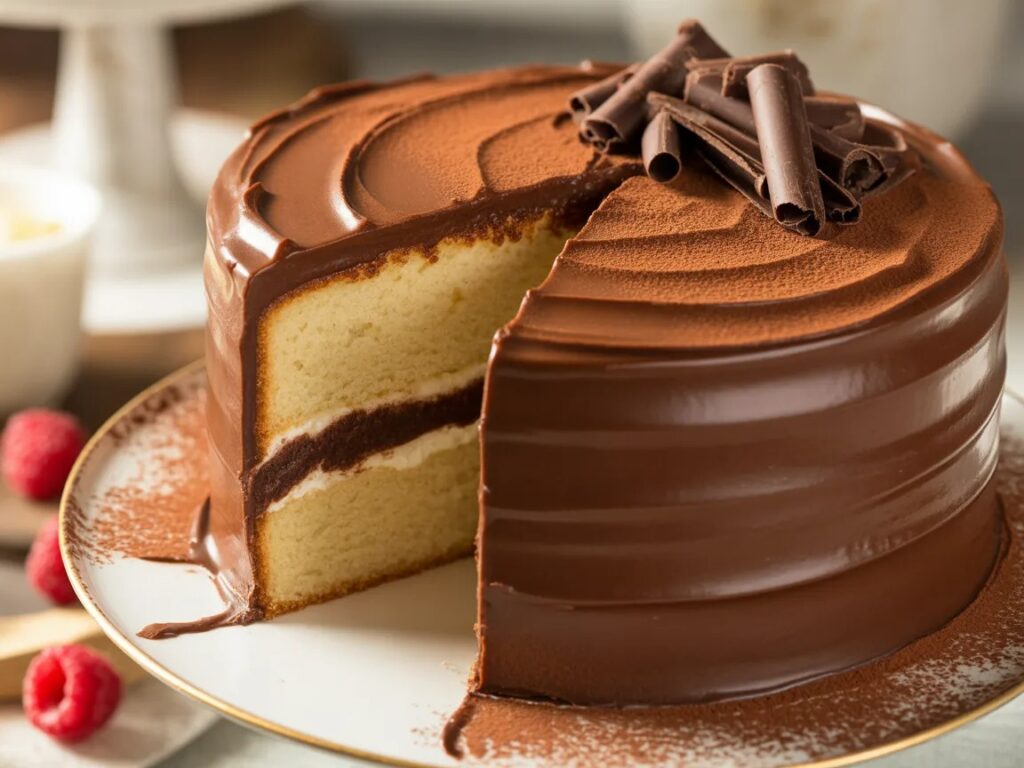
Here’s the thing about a great homemade cake — it has a flavor depth and a tender, buttery crumb that no box mix on earth can replicate. Real butter, real eggs, real vanilla, and properly creamed ingredients produce a cake that tastes like someone made it with actual care, because you did. The texture is soft without being spongy, rich without being heavy, and moist enough that every slice holds together beautifully on a fork. The chocolate buttercream is smooth, creamy, and perfectly balanced — not too sweet, not too intense, just exactly right. This recipe is also incredibly forgiving once you understand a few key principles, and those principles carry over to virtually every cake recipe you’ll ever make. FYI, once you nail this one, you basically have a superpower. Every future bake builds on what you learn here, which makes this more than just a cake recipe — it’s a foundation for your entire baking life. No pressure though.
Ingredients You’ll Need
For the Vanilla Butter Cake:
- [ ] 2.5 cups cake flour — lower protein than all-purpose; produces a noticeably finer, more tender crumb that makes a real difference
- [ ] 2.5 teaspoons baking powder — fresh please; stale baking powder is responsible for more flat cakes than anyone admits
- [ ] 1/2 teaspoon salt — non-negotiable flavor enhancer that makes everything else taste more like itself
- [ ] 1 cup (2 sticks) unsalted butter, room temperature — genuinely soft, like it leaves an indent when you press it; not melted, not cold
- [ ] 2 cups granulated white sugar — yes, the full amount; this is a celebration cake, not a diet plan
- [ ] 4 large eggs, room temperature — cold eggs shock the batter and cause curdling; pull them out an hour early
- [ ] 1 tablespoon pure vanilla extract — use the real stuff; the cake’s entire flavor profile depends on this
- [ ] 1 cup whole milk, room temperature — full fat for the richest result; this is not the place for skim milk
- [ ] 1/4 cup sour cream — the secret ingredient that adds subtle tang and keeps the crumb incredibly moist
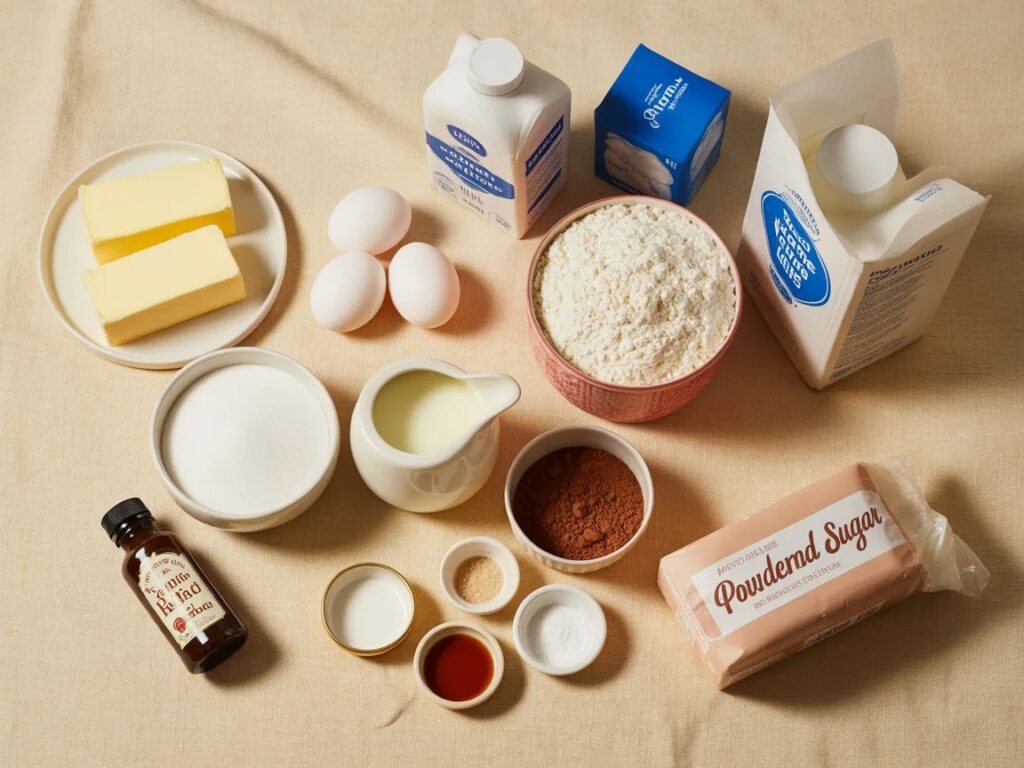
For the Chocolate Buttercream:
- [ ] 1.5 cups unsalted butter, softened — again, room temperature; cold butter makes grainy frosting
- [ ] 3 cups powdered sugar, sifted — sift it, seriously, lumpy frosting is avoidable
- [ ] 3/4 cup unsweetened cocoa powder, sifted — the quality of your cocoa directly affects the frosting flavor
- [ ] 1/3 cup heavy cream — for the perfect spreadable, silky consistency
- [ ] 1 teaspoon vanilla extract — because the frosting deserves flavor too
- [ ] 1 pinch of salt — balances the sweetness and deepens the chocolate flavor
Recommended Tools
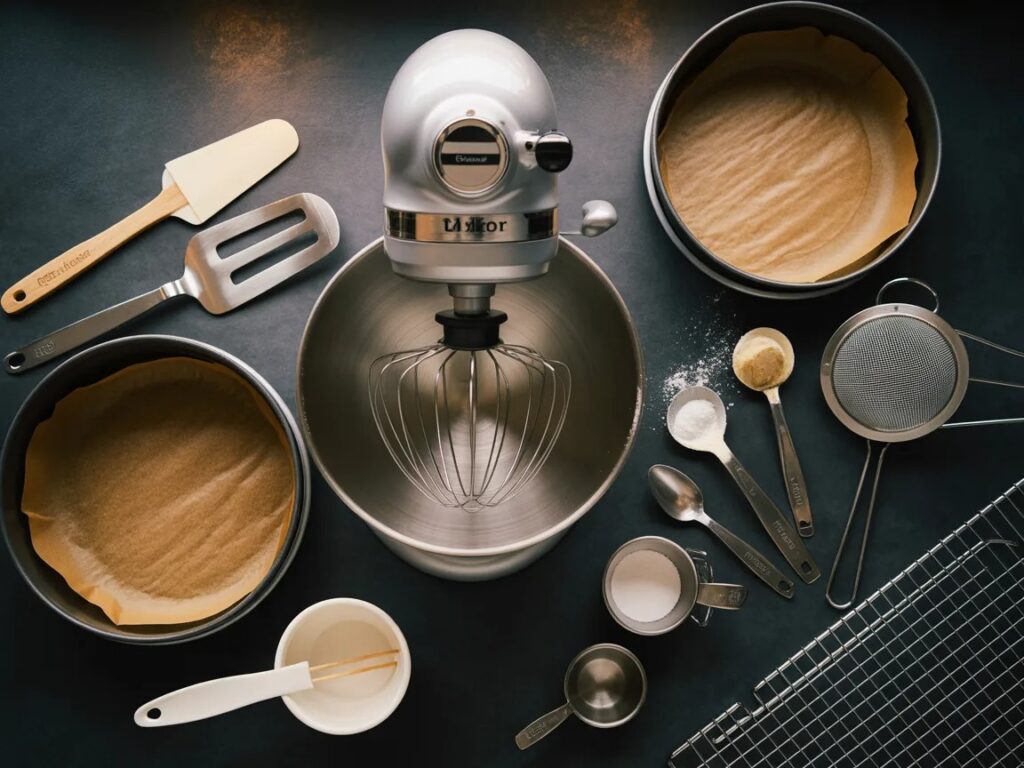
- Two 9-inch round cake pans — for a classic two-layer cake; line them with parchment and grease well
- Stand mixer with paddle attachment — the creaming process is long and your arm will give out before the butter and sugar are properly aerated; use the machine
- Electric hand mixer — a worthy alternative if you don’t have a stand mixer
- Large mixing bowls — at least two; one for dry ingredients, one for the mixing process
- Rubber spatula — for scraping down the bowl sides and getting every bit of batter
- Sifter or fine mesh strainer — for flour, cocoa, and powdered sugar; sifting prevents lumps
- Wire cooling rack — critical for even cooling before frosting; a plate traps steam
- Offset spatula — the best tool for spreading frosting smoothly and cleanly
- Measuring cups and spoons — baking is precise; measure everything
- Toothpick or cake tester — for confirming doneness before you pull the cake from the oven
Step-by-Step Instructions
- Preheat your oven to 350°F (175°C). Grease both 9-inch cake pans, line the bottoms with parchment circles, and grease the parchment too. Dust with a light coating of flour and tap out the excess. This preparation takes about 5 minutes and is the reason your cake releases cleanly instead of in frustrating pieces.
- Whisk together the cake flour, baking powder, and salt in a medium bowl and set aside. In a separate small bowl or measuring cup, combine the milk and sour cream and stir until smooth. Having both mixtures ready before you start the mixer keeps the process flowing without stressful pauses.
- Beat the softened butter in your stand mixer on medium speed for 2 minutes until smooth and creamy, then add the sugar and beat on medium-high for a full 4–5 minutes until very pale, fluffy, and significantly increased in volume. This creaming step builds the air structure of the entire cake — it’s not optional and it’s not done in 60 seconds. Set a timer and let the mixer run.
- Add the eggs one at a time, beating for 30 seconds after each addition, then add the vanilla extract. If the batter looks slightly curdled after the eggs go in, keep mixing — it will smooth out once the flour is added. Scrape down the sides of the bowl between additions to make sure everything incorporates evenly.
- Add the dry ingredients in three parts, alternating with the milk-sour cream mixture, beginning and ending with the dry ingredients. Mix on low speed after each addition, just until combined. Overmixing at this stage builds gluten and toughens the crumb — stop mixing the moment the last streak of flour disappears.
- Divide the batter evenly between the prepared pans — a kitchen scale makes this precise — and smooth the tops with a spatula. Tap each pan firmly on the counter 2–3 times to pop air bubbles. Bake for 30–35 minutes until a toothpick comes out clean and the edges are just beginning to pull away from the sides of the pan.
- Cool in the pans for 15 minutes, then turn out onto wire racks to cool completely. While the cakes cool, make the buttercream: beat the butter for 3 minutes until pale and fluffy, sift in the cocoa and powdered sugar gradually, add the cream, vanilla, and salt, and beat on high for 3–4 minutes until silky and spreadable. Frost the completely cooled cakes and try not to eat the frosting straight from the bowl. Try.
Nutrition Facts
━━━━━━━━━━━━━━━━━━━━━━━━━━━━━━━━━
       NUTRITION FACTS
       Serving Size: 1 slice (1/12 of cake)
       Servings Per Recipe: 12–14
━━━━━━━━━━━━━━━━━━━━━━━━━━━━━━━━━
Calories                        450
━━━━━━━━━━━━━━━━━━━━━━━━━━━━━━━━━
Total Fat                       24g     31%
  Saturated Fat                 15g     75%
  Trans Fat                      0g
Cholesterol                   115mg    38%
Sodium                        230mg    10%
Total Carbohydrate              57g     21%
  Dietary Fiber                  2g      7%
  Total Sugars                  42g
Protein                          5g
━━━━━━━━━━━━━━━━━━━━━━━━━━━━━━━━━
Vitamin A             175mcg    19%
Calcium               65mg       5%
Iron                  2.2mg     12%
Potassium            160mg       3%
━━━━━━━━━━━━━━━━━━━━━━━━━━━━━━━━━
*Based on a 2,000 calorie diet.
Chocolate buttercream included in estimate.
━━━━━━━━━━━━━━━━━━━━━━━━━━━━━━━━━
Recipe Variations
- Classic Vanilla on Vanilla — Swap the chocolate buttercream for a plain vanilla version by omitting the cocoa powder and increasing the powdered sugar slightly. Add a teaspoon of almond extract alongside the vanilla for a more complex, slightly floral flavor profile that elevates the whole cake without any extra effort.
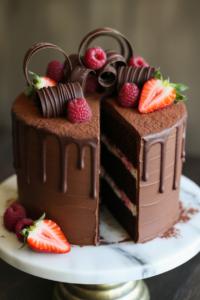
- Strawberry Layer Cake — Spread a generous layer of fresh strawberry jam or macerated strawberries between the cake layers before frosting, and use a vanilla or cream cheese buttercream on the outside. The fruity contrast against the buttery vanilla cake is fresh, bright, and genuinely spectacular for summer gatherings.
- Brown Butter Cake — Brown the butter before using it in the batter: cook it in a saucepan until golden and nutty-smelling, then cool it completely and use it in place of regular softened butter. The nutty, caramelized depth it adds transforms this from a great vanilla cake into something truly extraordinary.
Recommended Ways to Serve
- Classic Birthday Cake Style — Place the frosted layer cake on a decorative stand, add candles if celebrating, and serve thick slices at room temperature with the chocolate frosting slightly softened. This is the full experience — no accompaniments needed, just pure homemade cake joy.
- With Fresh Berries and Whipped Cream — Plate slices alongside a handful of fresh raspberries or strawberries and a dollop of lightly sweetened whipped cream. The acidity of the berries cuts through the richness of the butter and chocolate frosting in the best possible way.
- Warm with Ice Cream — Slice and microwave individual pieces for 15 seconds, then serve with a scoop of vanilla bean ice cream. The frosting softens and gets slightly glossy, the cake warms through, and the cold ice cream against the warm cake is one of life’s genuinely simple pleasures.
Storing and Reheating Guidelines
- Room Temperature — Store the frosted cake covered under a cake dome at room temperature for up to 2–3 days. The butter and sour cream in the crumb keep it fresh and moist well beyond day one — in fact, day two is often the best day for this cake as the flavors settle.
- Refrigerator — Refrigerate covered for up to 5–6 days. Always bring the cake back to room temperature before serving — cold butter-based frosting gets stiff and loses its creamy texture, and the cake crumb tightens when chilled. Give it at least 45 minutes on the counter first.
- Freezer — Freeze individual unfrosted cake layers wrapped tightly in plastic wrap then in foil for up to 3 months. Thaw overnight in the fridge and bring to room temperature before frosting. You can also freeze frosted slices on a baking sheet, then wrap individually once solid — perfect for controlled portions on demand.
Common Mistakes to Avoid & Fixes
| ❌ Mistake | ✅ Fix |
|---|---|
| Using cold butter for the creaming step | Cold butter doesn’t cream properly and results in a dense, flat cake. Pull it out of the fridge an hour ahead — it should be soft enough to leave a finger indent when pressed. |
| Rushing the creaming process | 60 seconds of mixing butter and sugar does not equal creamed butter and sugar. You need a full 4–5 minutes on medium-high until the mixture is pale, light, and fluffy. Set a timer. |
| Measuring flour by scooping from the bag | Scooping packs the flour and can add up to 30% more than the recipe intends. Spoon flour into your measuring cup and level it off with a straight edge every single time. |
| Opening the oven door before 25 minutes | A sudden rush of cool air causes the cake to collapse in the center. Wait until at least the 25-minute mark before you even peek, and only open fully for the toothpick test. |
| Frosting a warm cake | The buttercream will melt immediately, slide off the sides, and create a sad, greasy mess. Patience is the entire virtue here — cool completely before frosting, no exceptions. |
| Skipping the sifting step for the frosting | Unsifted powdered sugar and cocoa powder create lumps in the buttercream that no amount of beating will fully remove. Sift them and the frosting comes out silky and professional every time. |
| Not scraping down the mixer bowl | Unmixed pockets of butter or sugar hiding at the bottom of the bowl create uneven batter. Stop the mixer every few additions and scrape thoroughly with a rubber spatula. |
Alternatives & Substitutions
- All-purpose flour instead of cake flour — Use 2.25 cups of all-purpose flour in place of 2.5 cups of cake flour. The crumb will be slightly less delicate but still very good. For an even closer result, replace 2 tablespoons of each cup of all-purpose flour with cornstarch — it mimics the lower protein content of cake flour.
- Greek yogurt instead of sour cream — Full-fat Greek yogurt is a direct, equal swap that works beautifully. IMO, the flavor difference is essentially undetectable in the finished cake and Greek yogurt is easier to find in most households.
- Brown butter — Swap regular softened butter for cooled browned butter for a nutty, toffee-like depth that elevates the cake from delicious to genuinely memorable. Adjust the mixing method slightly as browned butter won’t cream the same way — fold it in with the wet ingredients instead.
- Vanilla Swiss meringue buttercream instead of chocolate — For a lighter, less sweet frosting, make a Swiss meringue buttercream: heat egg whites and sugar over a double boiler, whip to stiff peaks, then add softened butter gradually. Silkier, more elegant, and less overwhelmingly sweet.
- Dairy-free version — Use vegan butter, plant-based milk, and dairy-free sour cream. The texture is slightly different but the result is still a genuinely good cake — tested and surprisingly impressive.
- Add espresso powder to the buttercream — Stir 1 teaspoon of instant espresso powder into the chocolate buttercream. It doesn’t make it taste like coffee — it intensifies and deepens the chocolate flavor in a way that’s hard to explain but impossible to argue with.
FAQ (Frequently Asked Questions)
Q. Can I use all-purpose flour instead of cake flour? Ans: Yes — see the substitution notes above. The crumb won’t be quite as fine and tender, but the cake will still be genuinely delicious. If you bake cakes regularly though, cake flour is worth keeping in your pantry. The difference in texture is real and noticeable.
Q. Why did my cake sink in the middle? Ans: A few culprits — underbaking (the center wasn’t set when you pulled it out), opening the oven too early and letting cool air in, or too much leavener causing rapid rise followed by collapse. Always do the toothpick test, resist the urge to peek early, and measure your baking powder accurately.
Q. Can I make this cake as cupcakes? Ans: Absolutely. Line a cupcake pan with paper liners, fill each 2/3 full, and bake at 350°F for 18–22 minutes. This batter makes about 24 cupcakes. They’re perfect for parties and significantly easier to transport than a layer cake.
Q. How do I get perfectly flat, even cake layers? Ans: Two approaches — use cake strips (wet fabric strips wrapped around the pan that slow the edge baking and prevent doming), or simply level uneven layers with a serrated knife once they’ve cooled. The leveled-off pieces are the baker’s reward. No shame in eating them immediately.
Q. My buttercream is too stiff / too runny — how do I fix it? Ans: Too stiff? Add heavy cream one tablespoon at a time and beat until you reach the right consistency. Too soft or runny? Add more sifted powdered sugar a few tablespoons at a time. Temperature matters too — if your kitchen is very warm, the butter in the frosting softens quickly. Chill the bowl for 10 minutes and re-beat.
Q. Can I make the cake layers ahead of time? Ans: Yes — bake them, cool completely, wrap each layer tightly in plastic wrap, and store at room temperature for up to 1 day or refrigerate for up to 3 days before assembling. Frost on the day of serving for the freshest result.
Q. Do I really need a stand mixer for this recipe? Ans: You need some kind of electric mixer — a hand mixer works perfectly well. Doing it fully by hand is technically possible but the creaming step alone takes 8–10 minutes of vigorous hand-mixing to get anywhere close to the right texture. Your arm will file a formal complaint. Use a mixer.
Latest Articles
-
Chocolate Cake Decoration: Make It Look Like You Actually Tried
-
-
🥬 Kitchen Vegetable Storage: Keeping Your Harvest Fresh as a Dew-Kissed Meadow
-
Air Fryer Baked Potatoes: Crispy Outside, Fluffy Inside, Zero Patience Required
-
Hashbrown Breakfast Casserole: The Breakfast That Does All the Heavy Lifting
-
🍳 Kitchen Decor Ideas: Transforming Your Cooking Space into a Warm, Functional Meadow
Final Thoughts
Making a homemade cake from scratch is one of those kitchen experiences that genuinely changes how you think about baking. Once you understand the why behind each step — why you cream the butter so long, why you alternate wet and dry, why room temperature matters — everything clicks into place and you stop following a recipe blindly and start actually baking. This vanilla butter cake with chocolate buttercream is the perfect place to start that journey: classic, reliable, crowd-pleasing, and deeply satisfying to make from start to finish. Every slice you serve to someone is a slice of something you built entirely from scratch, and that never stops feeling good. Now go preheat that oven, pull that butter out of the fridge, and bake yourself something worth celebrating. You’ve absolutely earned it. 🎂