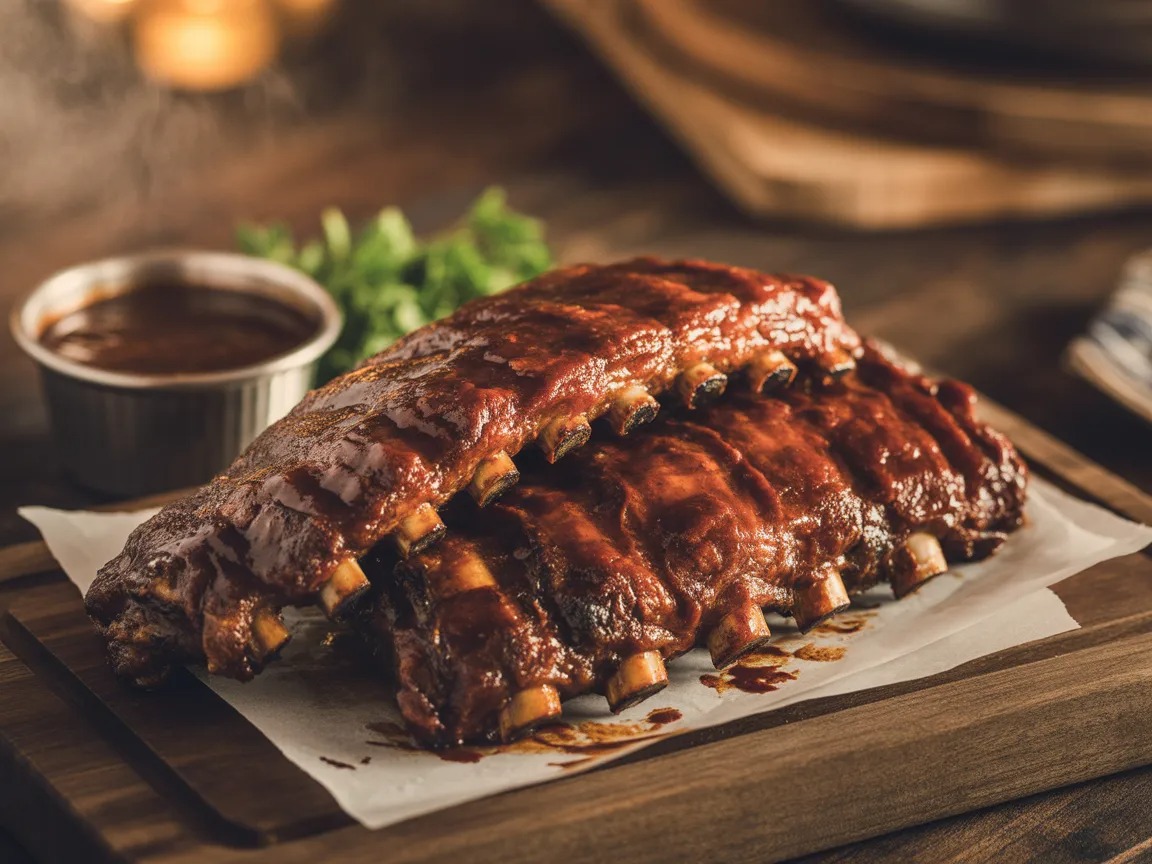
Let’s address the elephant in the room — traditionally great ribs require a smoker, a specific wood, a six-hour commitment, and the kind of confident pitmaster energy most of us simply don’t have on a random weeknight. But here’s what nobody talks about enough: the Instant Pot makes genuinely spectacular ribs in under an hour, with a tender, pull-apart texture that makes people embarrassingly emotional at the dinner table. Dry rub, pressure cook, quick broil, done. These ribs are fast, they’re ridiculously delicious, and they’re about to become your most-requested recipe. Let’s get into it.
Quick Look at the Recipe
| 🎓 Skill Level | ⏱️ Prep Time | 🍳 Cook Time | ⏰ Total Time |
|---|---|---|---|
| Easy | 15 minutes | 35 minutes | 55 minutes |
| 🍽️ Servings | 📋 Course | 🌍 Cuisine | 🔥 Calories |
|---|---|---|---|
| 4 | Main Course | American BBQ | ~590 kcal per serving |
Why This Recipe is Awesome
Traditional low-and-slow ribs are a labor of love — and on a Sunday with nowhere to be, absolutely worth every hour. But what about Tuesday? What about when guests arrive in 45 minutes and you confidently told everyone you were “making ribs”? This is where the Instant Pot earns its counter space. The pressure cooker environment replicates hours of slow cooking in a fraction of the time, breaking down collagen and connective tissue into silky, tender, pull-from-the-bone perfection.
The dry rub builds a deeply flavored crust, the apple cider vinegar and broth create a steamy, tangy cooking environment, and a quick 5-minute broil at the end glazes the BBQ sauce into that sticky, caramelized finish everyone associates with great ribs. The whole process is genuinely hard to mess up — and that’s coming from someone who has messed up a lot of things in a kitchen. It’s fast, it’s forgiving, and the results are show-stopping. What else do you need to know?
Ingredients You’ll Need
For the Dry Rub:
- [ ] 2–3 lbs (900g–1.4kg) pork baby back ribs — one rack typically; baby backs are the move for the Instant Pot due to their size and tenderness
- [ ] 2 tbsp brown sugar — for sweetness and caramelization; light or dark both work
- [ ] 1 tbsp smoked paprika — the most important flavor in the rub; don’t use sweet paprika and expect the same result
- [ ] 1 tsp garlic powder
- [ ] 1 tsp onion powder
- [ ] 1 tsp fine salt
- [ ] ½ tsp black pepper
- [ ] ½ tsp cayenne pepper — dial it up or down depending on your heat preference
- [ ] ½ tsp dried mustard powder — adds a tangy backbone to the rub
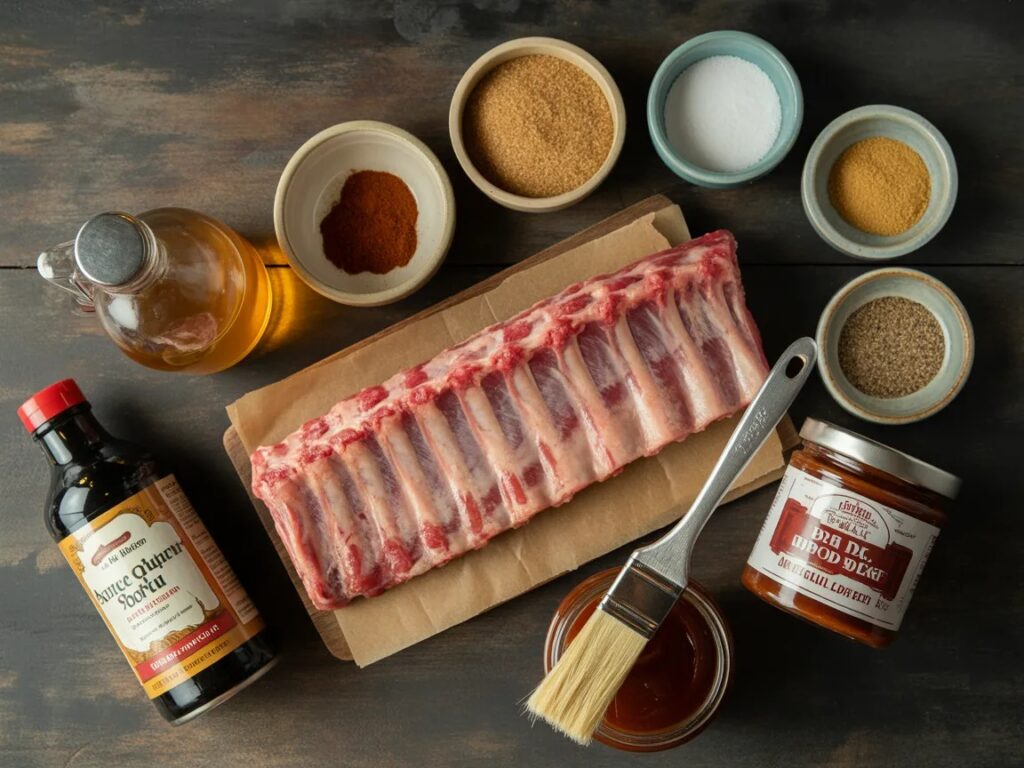
For the Instant Pot Liquid:
- [ ] 1 cup (240ml) apple cider vinegar — the acidic base that tenderizes and adds subtle tang
- [ ] ½ cup (120ml) water or chicken broth
- [ ] 1 tbsp Worcestershire sauce — for depth and umami in the cooking liquid
- [ ] 1 tsp liquid smoke — optional but adds that wood-fired illusion beautifully
For the Finish:
- [ ] ¾ cup (180ml) your favorite BBQ sauce — store-bought works perfectly; use one you genuinely enjoy drinking from the bottle
- [ ] Extra BBQ sauce for serving — always
Recommended Tools
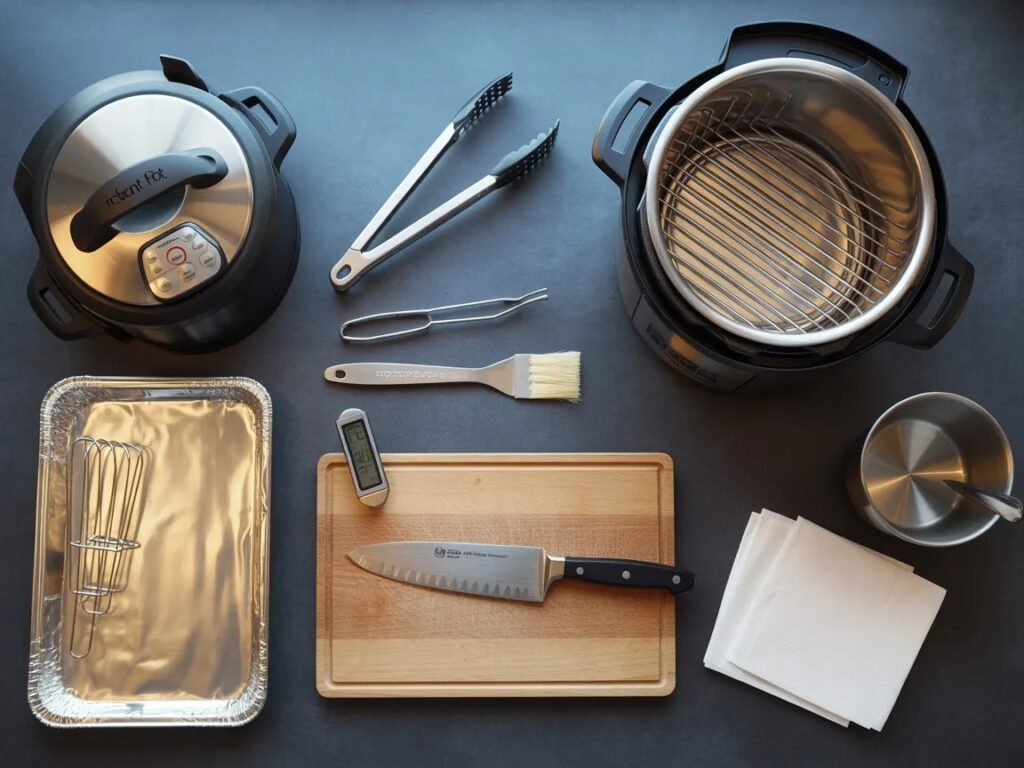
- 6-quart Instant Pot or larger — a rack of baby backs stands up around the perimeter; anything smaller struggles with a full rack
- Metal trivet / steam rack — keeps the ribs elevated above the liquid so they steam rather than boil; comes with most Instant Pots
- Sharp knife — for removing the membrane and cutting the rack into sections to fit
- Paper towels — for patting dry before the rub goes on; moisture prevents the rub from adhering
- Small bowl — for mixing the dry rub ingredients together
- Foil-lined baking sheet — for the broiling finish; the sugar-laden BBQ glaze drips and burns onto unprotected pans
- Pastry brush — for applying the BBQ sauce glaze evenly and generously
- Long tongs — for handling the ribs safely in and out of the hot pot and under the broiler
Step-by-Step Instructions
1. Remove the Membrane Flip the rack of ribs bone-side up. Find the thin, papery silver membrane stretched across the bones — slide a butter knife under the edge near one end, grip it firmly with a paper towel for traction, and peel it off in one satisfying strip. Leaving this membrane on is the number one reason people end up with tough, chewy ribs — it doesn’t soften under pressure cooking and creates an unpleasant barrier. Remove it every time, no exceptions.
2. Cut the Rack to Fit Cut the full rack into sections of 3–4 ribs each. This isn’t about portioning — it’s about fitting them into the Instant Pot efficiently. Stand the sections up vertically around the inside edge of the pot in a circle, meat-side facing outward. This positioning allows even heat distribution and prevents the ribs from sitting directly in the cooking liquid.
3. Mix and Apply the Dry Rub Combine all dry rub ingredients in a small bowl and mix thoroughly. Pat the rib sections completely dry with paper towels — this helps the rub stick and form a better crust. Apply the rub generously to all surfaces of each rib section, pressing it in firmly with your hands. For deeper flavor penetration, wrap the rubbed ribs in plastic wrap and refrigerate for 2–8 hours before cooking, though this is optional if time is short.
4. Set Up the Instant Pot Pour the apple cider vinegar, water or broth, Worcestershire sauce, and liquid smoke (if using) into the bottom of the Instant Pot insert. Place the metal trivet inside. Arrange the rubbed rib sections standing upright on and around the trivet — bone ends down, curved side against the pot wall. The ribs should be snug but not jammed; there should be room for steam to circulate.
5. Pressure Cook on High Secure the Instant Pot lid and set the valve to Sealing. Cook on High Pressure for 25 minutes for baby back ribs, or 28 minutes for slightly thicker spare rib sections. The pot will take 10–12 minutes to come to pressure before the countdown starts. Do not skip — do not rush — do not open the lid during cooking. Trust the machine.
6. Natural Release for 10 Minutes When cooking completes, let the pressure release naturally for 10 minutes — do not immediately switch to quick release. This rest time allows the collagen to finish converting and the meat fibers to relax, resulting in significantly more tender ribs. After 10 minutes, carefully switch the valve to Venting to release any remaining pressure before opening.
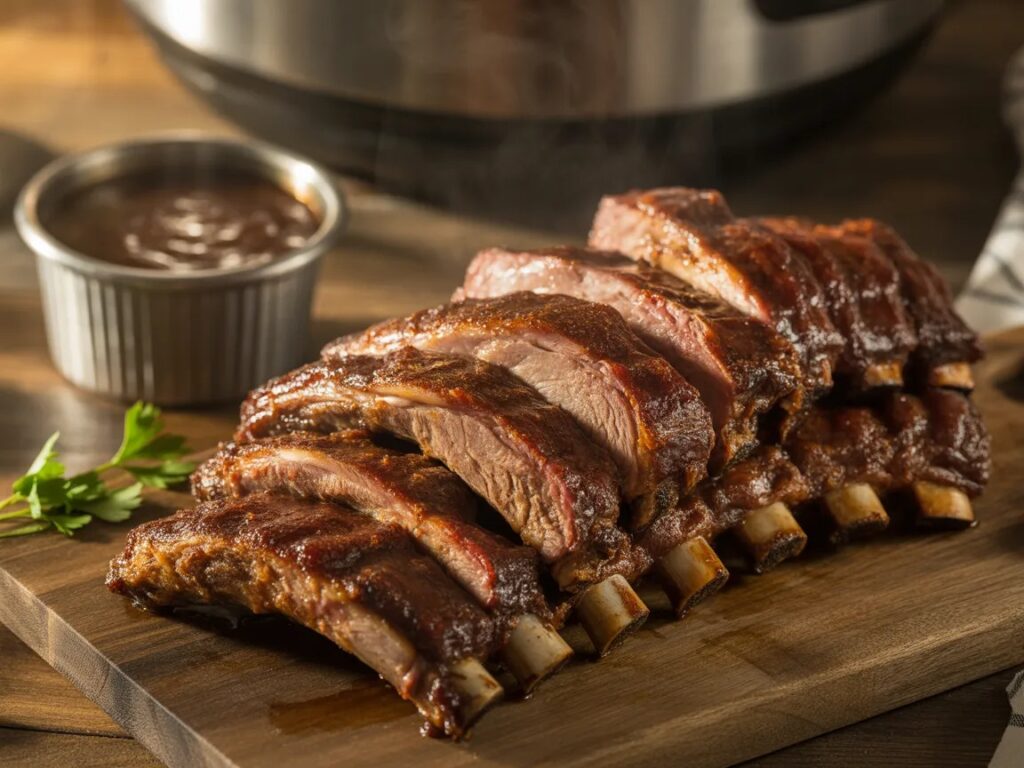
7. Broil for the Sticky Finish Preheat your oven broiler to high. Carefully transfer the rib sections bone-side up onto the foil-lined baking sheet. Brush generously with BBQ sauce. Broil for 3–4 minutes until the sauce bubbles and caramelizes. Flip to meat-side up, brush with more BBQ sauce, and broil for another 3–5 minutes until deeply glossy and caramelized. Watch closely — the sugar in the sauce goes from perfect to charcoal in under a minute at broiler temperatures.
8. Rest and Serve Remove from the broiler and let the ribs rest for 5 minutes before cutting or serving. This short rest redistributes the juices so they stay in the meat rather than running all over your cutting board. Cut between the bones, arrange on a platter with extra BBQ sauce alongside, and prepare for the kind of silence at the dinner table that means everyone is too busy eating to talk.
Nutrition Facts
| Serving Size | 3–4 ribs (approx. 260g) |
| Calories | 590 kcal |
| Total Fat | 36g |
| — Saturated Fat | 13g |
| — Trans Fat | 0g |
| Cholesterol | 160mg |
| Sodium | 780mg |
| Total Carbohydrates | 20g |
| — Dietary Fiber | 0.5g |
| — Total Sugars | 16g |
| Protein | 46g |
| Iron | 2.2mg |
| Potassium | 530mg |
| Calcium | 50mg |
Based on 4 servings with standard BBQ sauce. Values are estimates.
Recipe Variations
- Asian-Style Sticky Ribs: Replace the dry rub’s paprika and cayenne with Chinese five-spice powder and ground ginger. Swap the BBQ sauce glaze for a mixture of hoisin sauce, soy sauce, honey, sesame oil, and a splash of rice vinegar. Broil as usual and finish with toasted sesame seeds and thinly sliced scallions. The flavor is bold, aromatic, and completely different from classic BBQ — equally spectacular.
- Honey Mustard Ribs: Use the same base dry rub but swap the finishing BBQ sauce for a homemade honey mustard glaze: equal parts Dijon mustard and honey, with a tablespoon of apple cider vinegar and a pinch of garlic powder. Brush on before broiling and again halfway through. The tangy-sweet result is lighter than traditional BBQ and pairs beautifully with coleslaw and roasted potatoes.
- Spicy Chipotle Cola Ribs: Add 1 teaspoon of chipotle chili powder to the dry rub. Replace the water in the cooking liquid with ½ cup of cola — the sugar and acidity tenderize and add a subtle sweetness to the cooking environment. Use a chipotle-spiked BBQ sauce for the finish. The combination of deep smoke, heat, and cola sweetness creates something genuinely memorable.
Recommended Ways to Serve
- Classic BBQ Plate: Pile the glazed ribs on a large board or platter alongside creamy coleslaw, baked beans, corn on the cob, and thick slices of white bread or cornbread. Set out extra BBQ sauce and a tall stack of napkins — the informal, hands-on setup is part of the whole rib-eating experience and nobody’s complaining.
- Game Day Rib Platter: Cut the ribs into individual bones and arrange on a large serving platter with small ramekins of dipping sauces — classic BBQ, honey mustard, and ranch. Guests grab individual bones and it becomes an interactive appetizer rather than a full dinner. This format works brilliantly for groups and disappears very, very fast.
- With Simple Weeknight Sides: Serve alongside roasted sweet potato wedges and a simple green salad for a weeknight dinner that feels significantly more special than the effort involved. The ribs are the star — keep everything else minimal and let them carry the meal without competition.
Storing and Reheating Guidelines
- Refrigerator: Store leftover ribs in an airtight container or wrapped tightly in foil for up to 4 days. They taste excellent the next day — arguably better as the rub and sauce flavors continue to meld and deepen overnight. Store with any remaining cooking juices drizzled over to keep the meat moist.
- Freezer: Wrap individual portions or full sections tightly in plastic wrap and then foil and freeze for up to 3 months. Thaw overnight in the refrigerator before reheating. Instant Pot ribs freeze exceptionally well — the texture holds up better than most cooked proteins after freezing and reheating.
- Reheating: The oven is your best reheating method — place ribs on a foil-lined baking sheet, brush with fresh BBQ sauce, cover loosely with foil, and reheat at 300°F (150°C) for 20–25 minutes until warmed through. Remove the foil for the last 5 minutes to re-caramelize the glaze. Microwave works in a pinch but the texture suffers slightly — use 60–70% power in 90-second intervals to avoid drying them out.
Common Mistakes to Avoid & Fixes
| ❌ Mistake | ✅ Fix |
|---|---|
| Leaving the membrane on | The silver skin stays tough and chewy regardless of cook time. It takes 60 seconds to remove and makes an enormous difference in the final eating experience. No excuses — remove it every time. |
| Skipping the 10-minute natural release | Immediately quick-releasing after cooking interrupts the final collagen breakdown and results in noticeably less tender ribs. The 10-minute wait is part of the cook — honor it. |
| Not setting the valve to Sealing | The most common Instant Pot mistake across every recipe. If the valve is on Venting, no pressure builds and nothing cooks properly. Check it before you walk away every single time. |
| Skipping the broiler finish | Pressure-cooked ribs without broiling look pale, soft, and slightly sad. The 5-minute broil is what creates the caramelized, sticky, BBQ-restaurant exterior that makes ribs look and taste the part. |
| Applying BBQ sauce before pressure cooking | Sauce added to the cooking liquid burns onto the pot and turns bitter over the long cook. Apply sauce only during the final broiling stage for the cleanest flavor. |
| Using too much cooking liquid | More liquid doesn’t mean better ribs — it just means more liquid. Stick to the specified amounts; excess liquid reduces the steam temperature and can slightly affect the cooking efficiency. |
Alternatives & Substitutions
- Spare ribs instead of baby backs: Spare ribs are larger, meatier, and slightly fattier with more connective tissue — they need 30–32 minutes on high pressure instead of 25. The result is incredibly rich and flavorful. IMO spare ribs have more character and are usually cheaper — a very good trade-off.
- Beef short ribs: These work beautifully in the Instant Pot with the same general method — increase pressure cook time to 35–40 minutes on high. Use beef broth in the liquid base instead of chicken broth. The flavor profile is deeper and richer than pork — a completely different but equally rewarding experience.
- No apple cider vinegar? White wine vinegar or regular white vinegar work as direct substitutes in the same amount. A squeeze of fresh lemon juice combined with a little extra water also provides the necessary acidity for tenderizing without changing the flavor significantly.
- Homemade BBQ sauce: If you have 15 minutes, a homemade sauce (ketchup + brown sugar + apple cider vinegar + Worcestershire + smoked paprika + garlic powder + a pinch of cayenne, simmered briefly) elevates the entire dish. The freshness and balance of homemade sauce on Instant Pot ribs is genuinely extraordinary — worth the extra effort when you have it.
- No liquid smoke? A teaspoon of smoked paprika added to the cooking liquid approximates some of the smoky depth. It’s not identical but it helps bridge the gap between pressure-cooked and wood-smoked flavor profiles, especially combined with the smoked paprika already in the dry rub.
FAQ (Frequently Asked Questions)
Q. Do Instant Pot ribs really taste as good as smoked ribs? Ans: Honestly — they’re different, not lesser. Smoked ribs have a smoke ring, a bark, and a depth from hours over wood that pressure cooking simply can’t fully replicate. But Instant Pot ribs have extraordinary tenderness, deeply flavored meat from the rub, and a beautiful caramelized glaze. They’re different experiences and both have a rightful place at the table. For a weeknight? Instant Pot wins every time.
Q. Can I cook two racks of ribs at once? Ans: Yes — cut both racks into sections and stand them up around the perimeter of a 6 or 8-quart pot. Don’t stack them flat on top of each other as this blocks steam circulation and creates uneven cooking. As long as the ribs fit with the lid closing properly and you don’t exceed the max fill line, two racks cook in the same time as one.
Q. My ribs were tough after pressure cooking. What happened? Ans: Either the cook time was too short, the pot didn’t reach full pressure (check the valve next time), or the membrane wasn’t removed. Try adding 5 more minutes to the pressure cook time for your next batch and ensure the valve is fully sealed before starting. Tough Instant Pot ribs are almost always an undercooking or valve issue — not an overcooking one.
Q. Can I skip the broiler step? Ans: You can — especially if the ribs are very fragile and difficult to transfer safely. Brush them with warmed BBQ sauce directly in the Instant Pot insert and use the Sauté function on high for 3–4 minutes to caramelize slightly. It won’t replicate the full broiler finish but it adds color and glaze without needing to move delicate ribs. Alternatively, use an outdoor grill on high for 3 minutes per side.
Q. How do I know when the ribs are done? Ans: The meat should have pulled back visibly from the bone tips — at least ¼ inch of exposed bone is a good sign. A fork should slide between the bones with minimal resistance. When you pick up a section with tongs, it should bend and begin to crack slightly under its own weight. These three signs together mean your ribs are ready for the broiler.
Q. Can I make this recipe with frozen ribs? Ans: Yes — skip the membrane removal (do it after cooking when the membrane has softened) and add 5–7 extra minutes to the pressure cook time. Make sure the ribs fit in the pot; a solid frozen block needs to be separated or at least thawed enough to arrange properly. Thawing overnight in the fridge is always preferred for best results, but frozen works in a pinch.
Q. What’s the best BBQ sauce for this recipe? Ans: The best BBQ sauce is genuinely the one you already love — cooking is not the place for sauces you’re lukewarm about. If you want a recommendation: a smoky, slightly sweet sauce with some tang works best for the broil-finish method. Sweet Baby Ray’s is a reliable crowd choice; a Kansas City-style sauce caramelizes beautifully. Avoid very thin sauces — they don’t glaze as well and tend to run off before they caramelize.
Latest Articles
-

Chocolate Cake Decoration: Make It Look Like You Actually Tried
-
-
🥬 Kitchen Vegetable Storage: Keeping Your Harvest Fresh as a Dew-Kissed Meadow
-
Air Fryer Baked Potatoes: Crispy Outside, Fluffy Inside, Zero Patience Required
-
Hashbrown Breakfast Casserole: The Breakfast That Does All the Heavy Lifting
-
🍳 Kitchen Decor Ideas: Transforming Your Cooking Space into a Warm, Functional Meadow
Final Thoughts
Instant Pot ribs are the recipe that turns skeptics into believers — people who thought great ribs required a smoker and an entire afternoon discover that a pressure cooker and under an hour produces something genuinely, impressively delicious. The dry rub builds real flavor, the pressure cook does the heavy lifting on texture and tenderness, and the broiler finish delivers the BBQ appearance and sticky glaze that makes everyone reach for seconds before the first round is even finished. This recipe works every time, for every occasion — weeknight dinners, game days, backyard gatherings, or just because you felt like having ribs on a Tuesday. Now go impress someone — or yourself — with your new culinary skills. You’ve absolutely earned it. And make sure you have enough napkins. Seriously — more than you think you need.